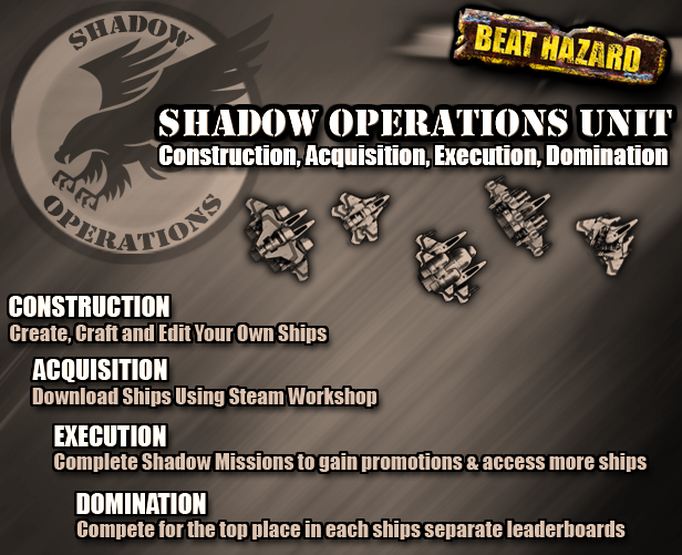
  I'm very excited to announce that Beat Hazard Ultra is now available on XBLIG.
Beat Hazard Ultra adds awesome new features to the original: - Co-op and Versus online and local multi-player - Boss Rush and Survival modes - 2 New bosses and 10 new enemy ships - 24 perks to unlock and 3 devastating tactical weapons Beat Hazard Ultra is 400 ms points, and you can try it out here: Store Page If you like what you see, please take the time to give it a favourable rating. Thanks! It's been quite a ride. Here are some interesting tip bits about the journey: - 1 Man, 3 Years, 7 Platforms and 3,000% Profit - Beat Hazard has sold in excess of 700,000 copies - Grossed over $2.2 million. - With overall development costs in the region of $70,000, this gives a return on investment of 3000%! Gold, Dragons & Steam Trading Cards! 
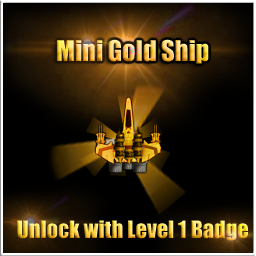
Steam Trading cards are now available for Beat Hazard on Steam. Cards are dropped at random while you play the game.  These are the 7 Beat Hazard cards you can collect. However, there is a catch. You can only get 4 of the cards by playing the game. To get the others you must trade surplus cards with other players that have the ones you don't. By trading you can complete the set. 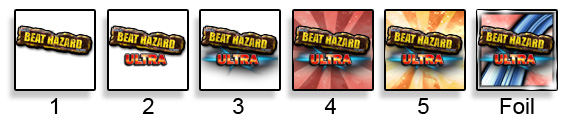 Once you have a set, you can 'craft' these into a badge. You start with a level 1 badge and work your way up to level 5.
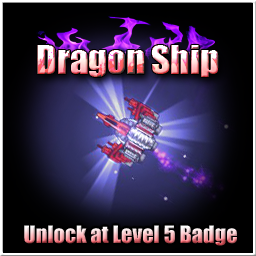
And this is where things go full circle. When you get a level 1 badge you will unlock the Mini Gold Ship. Get a Level 5 Badge and you will unlock the all new Dragon Ship! Note: The new ships are cosmetic only. They won't give you a score advantage if you use them. 
Enjoy retro style games? check my shooter, Beat Hazard. A shooter powered by your music!
Beat Hazard - Full Details Here
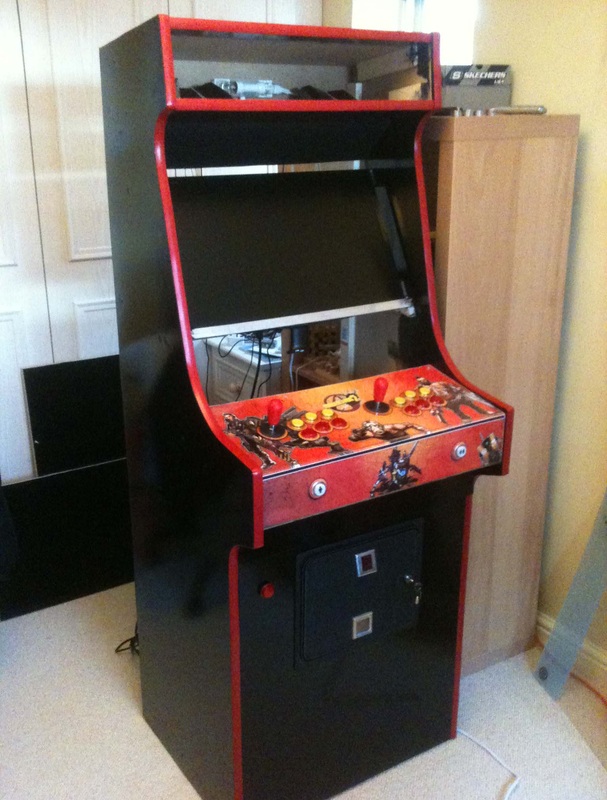
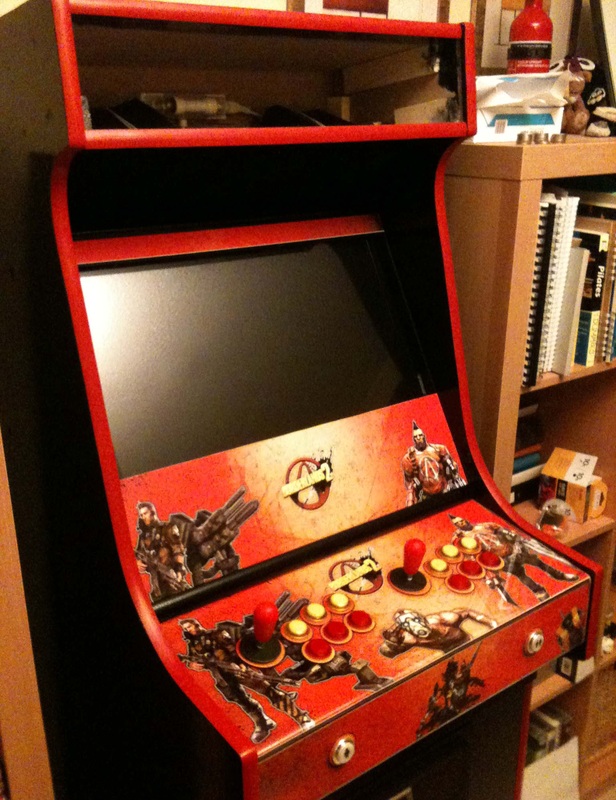
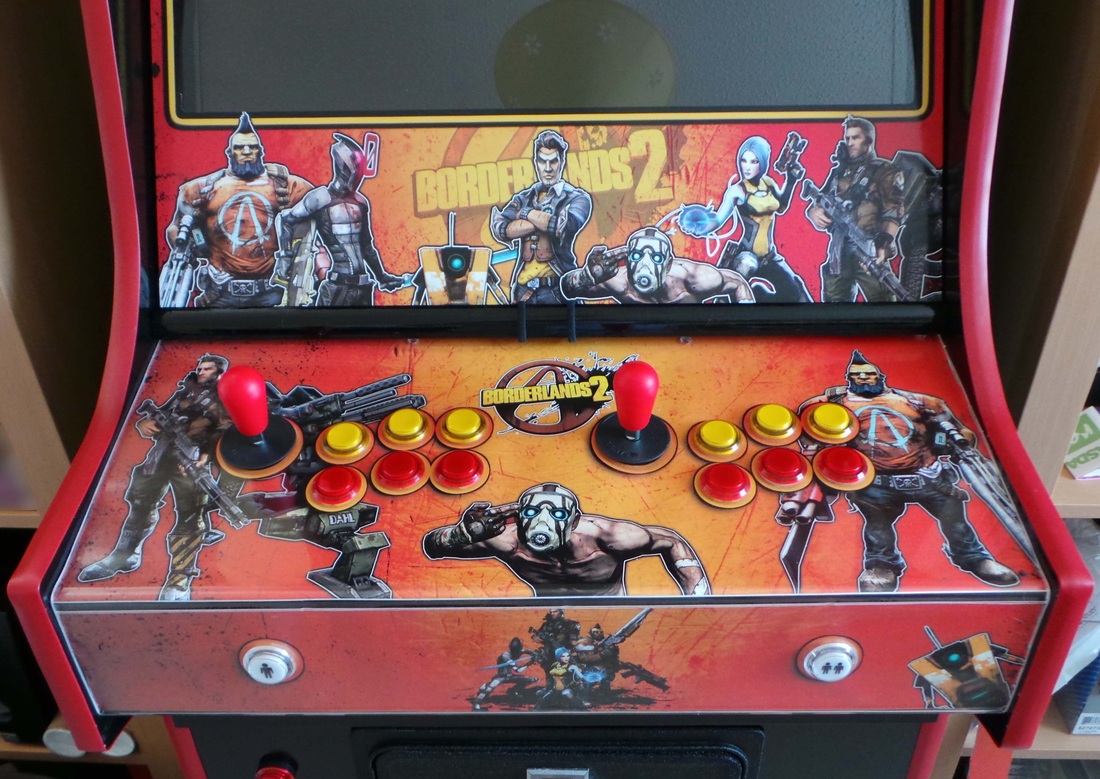
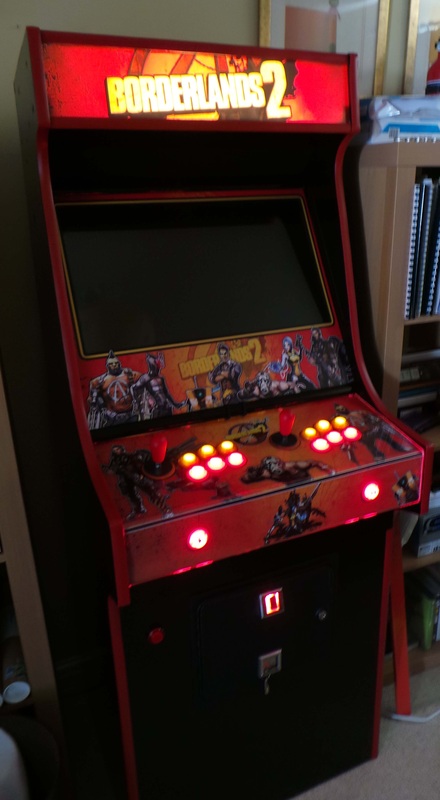
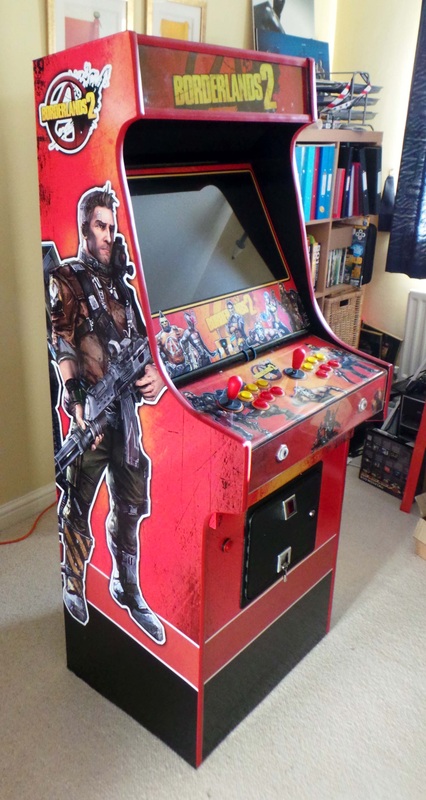
My 10 month epic build has finally come to an end and I've finished my Borderlands 2 Arcade Cabinet!
I've wanted to build a cabinet for years, but never really got round to it. Last October I took to plunge after browsing online arcade sites and being inspired by other peoples efforts. So here's my blow by blow cabinet construction blog, I hope you enjoy it. Feel free to contact me with questions if you're building your own. So, here we go... 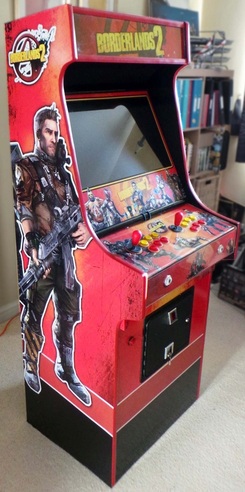
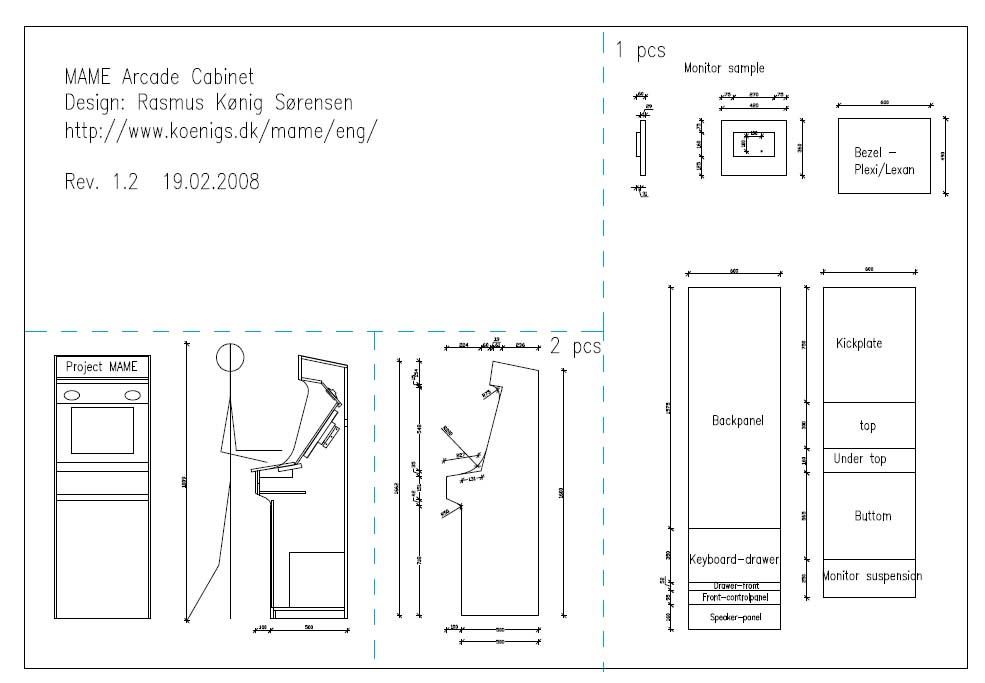
I stared by downloading some plans from the Project MAME & WeeCade website. An excellent site!
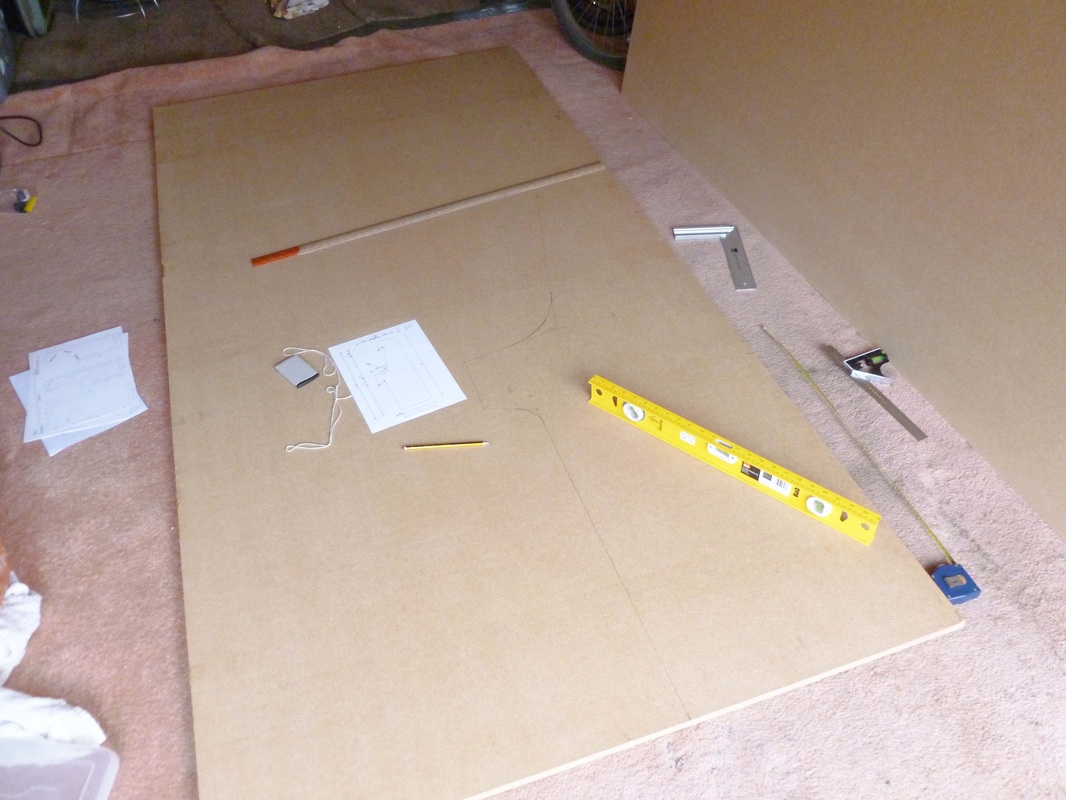
Here's my 3 sheets of 18mm MDF. I've scaled up the plans onto the MDF. The string is for drawing the arcs.
I used my jigsaw to cut the MDF (Don't forget to wear a mask, MDF dust is not good to breath in).
Jigsaws are surprisingly hard to control. You need a steady hand and lots of patience to get a good cut. It's also a good idea to have a vacuum clearer handy! 
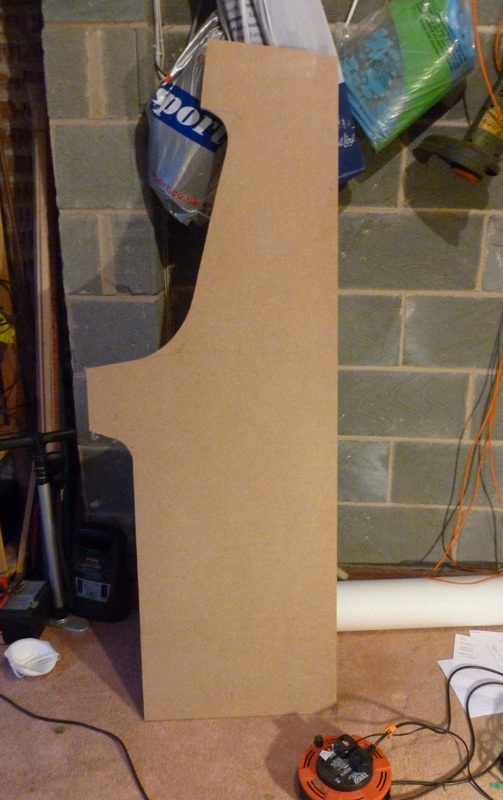
For side 2, I just drew around the first side to make sure both sides were exactly the same.
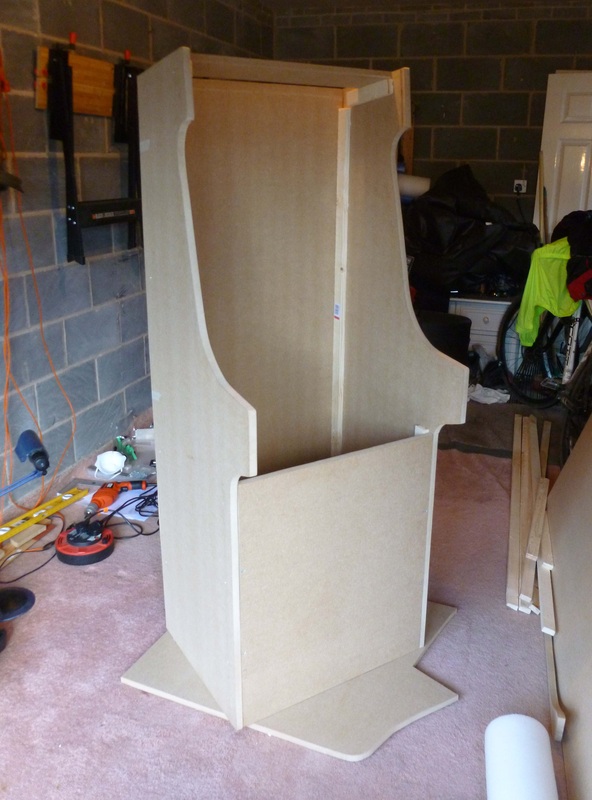
This was a great moment, the fist time my efforts looked like a real cabinet! The MDF is held together using 2mm x 6mm wood and countersunk screws.

Added the marquee surround at the top.
Ready to add the base. This was made by my Dad as a Christmas present! What a cool present!
Adding the base makes the whole thing more sturdy and solid. 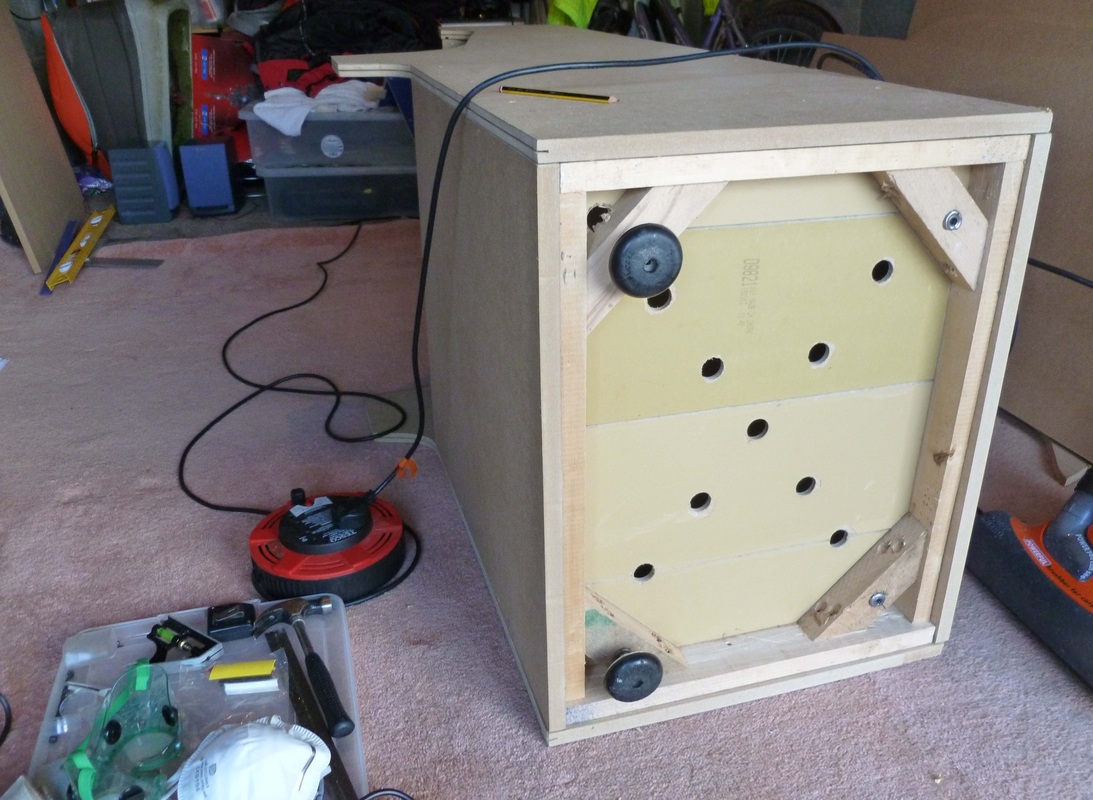
It took some time to line this up, but of course having the base in the right place is critical.
I didn't bother with wheels. These are pads from the bottom of a sofa. 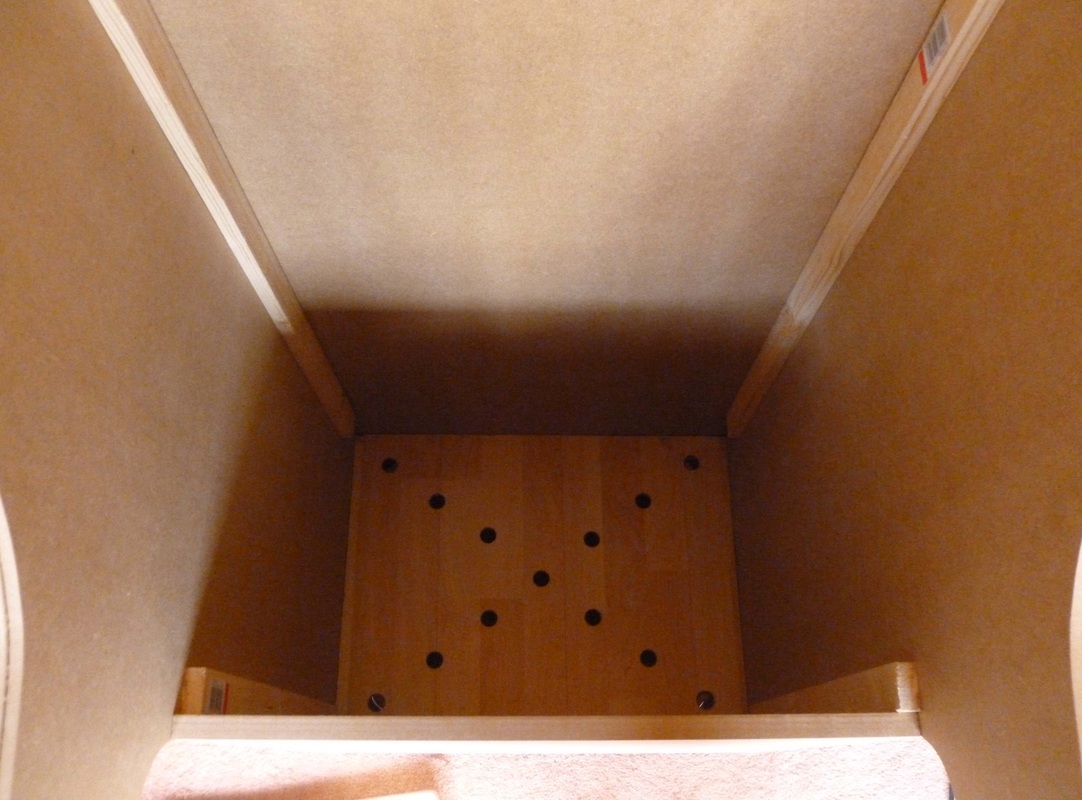
Looking solid.
I bought a router and some t-moulding samples. I then needed the correct sized slot cutter bit, arbor and bearing.
After a lot of searching I found a site here in the UK ( http://www.routercutter.co.uk/ ). To cut the correct slot for standard arcade T-moulding you need: - 6702A Slot cutter (Diam 47.63mm Kerf 2.03mm) - B25 Bearing (Outer Diam 28.58mm, Inner Diam 7.94) - A200B Arbor (Shank 6.35mm) So you can see in the picture the slot and the T-moulding sitting just right. 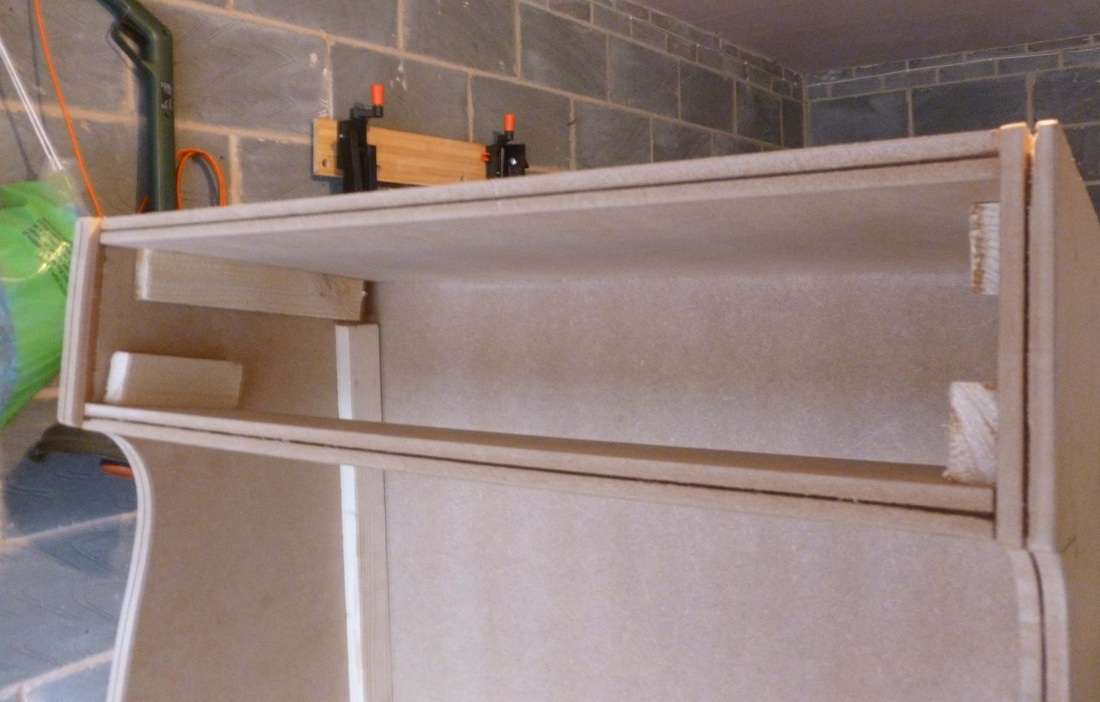
T-moulding would be around the marquee and down both sides. Here you can see the slots.
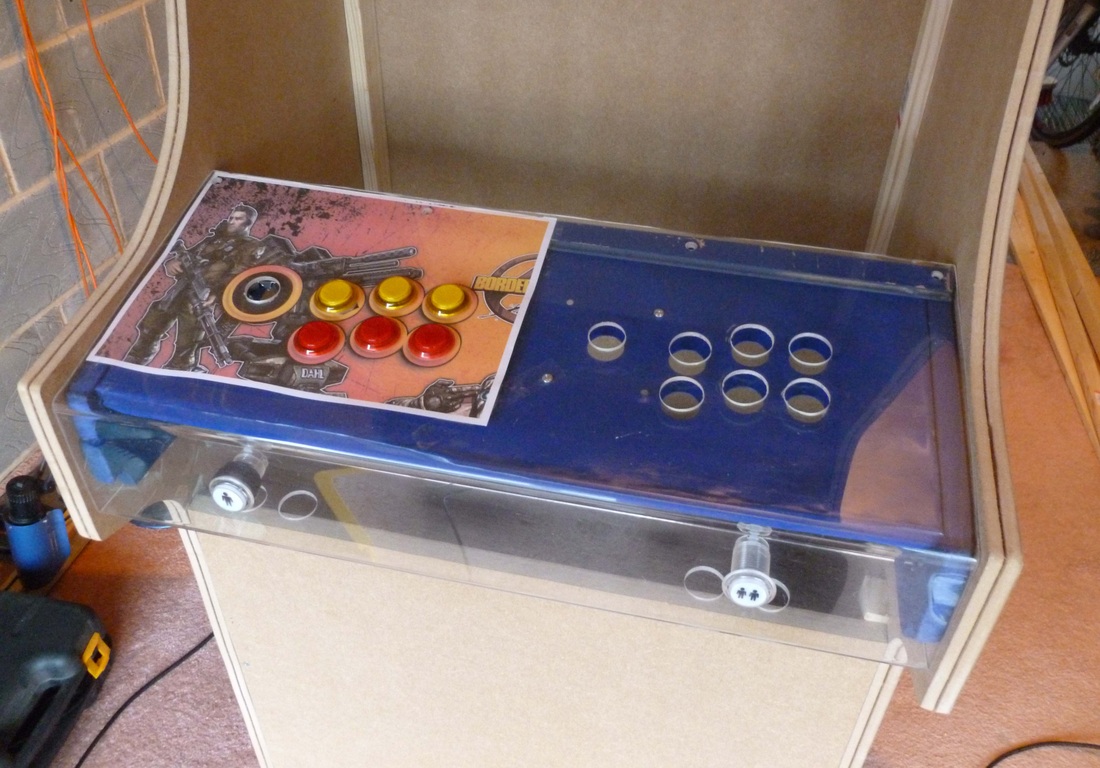
So now it was time to focus on the control panel. I ordered all the arcade parts I would need from Arcade World UK.
- 20x led buttons with relays (6 yellow, 2 white start buttons, 12 red) - 2x 8-way joysticks from Arcade World - 1 Min PAC Keyboard Encoder with wiring kit My Dad had some spare plexi-glass shelving, so he made the main parts of the control panel as another Christmas present! How cool! You can see the plexi-glass surround with a metal base underneath. The joysticks are mounted on the metal under the plexi-glass so when the artwork is in place you can't see the screws. 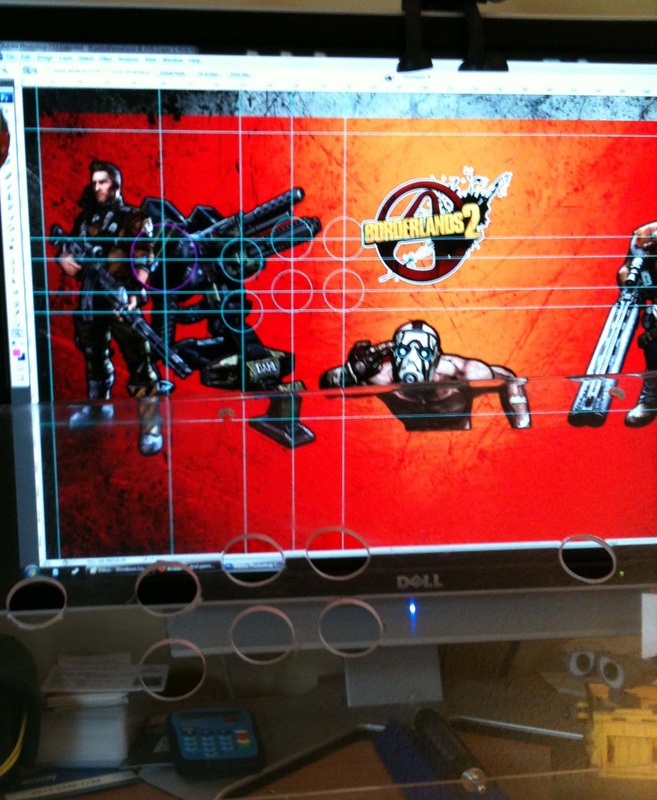
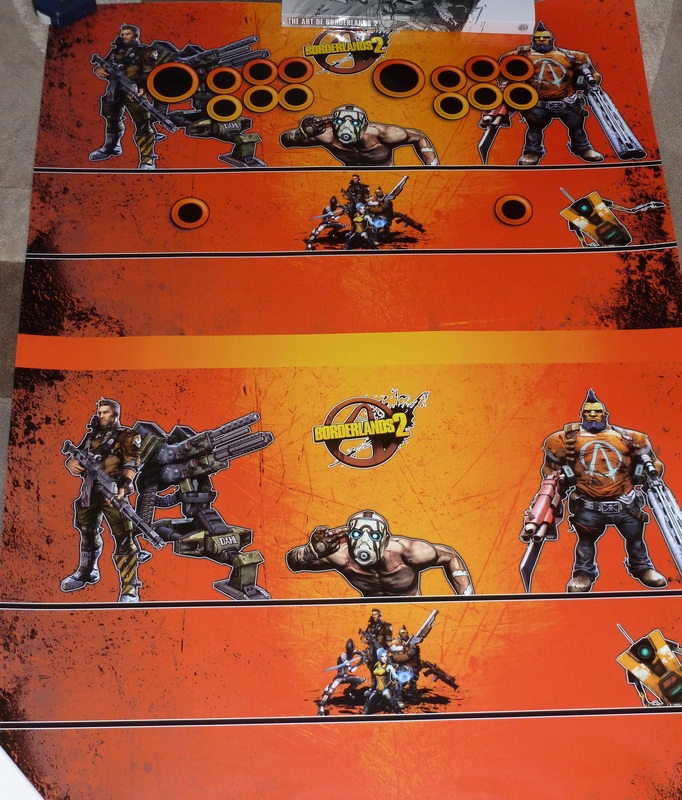
So, I now needed to decide on the art theme for my cabinet. My first thought of course was to make a Beat Hazard theme, but that seemed a bit obvious and I wanted this to be about something I liked, rather than just some sort of advert for my own work.
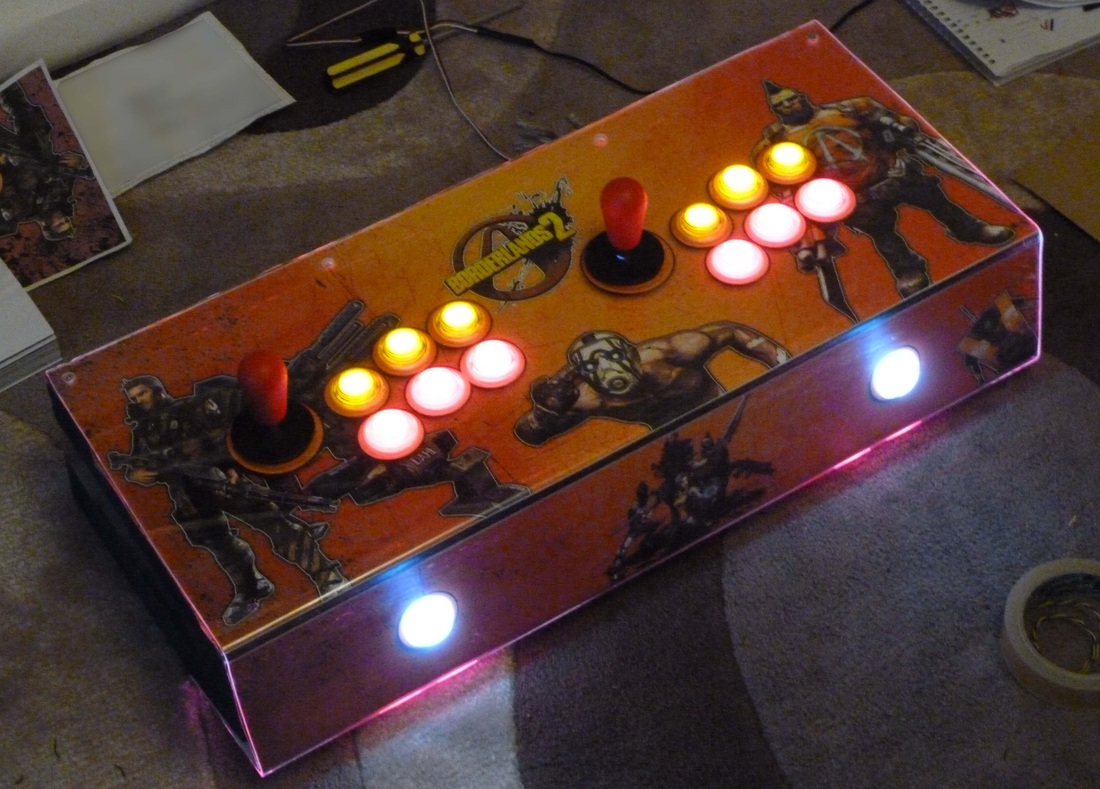
I also needed high rez art work. It came down to Battlefield 3 or Borderlands 2, two for my favourite Xbox games. In the end I went for the vibrant and striking art style of Borderlands, it seemed a perfect fit for an arcade machine. 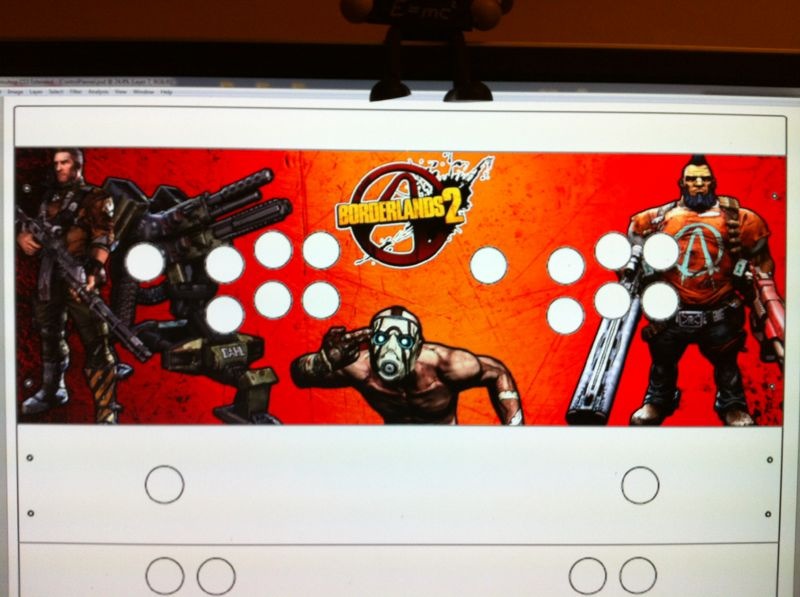
I grabbed some high rez artwork from the web and used photoshop to design the control panel.
Lining up the button holes with the artwork was surprisingly tricky. Here you can see a test print fitted to the panel.
Looking good, time to order a real vinyl print.
My first vinyl print hot of the press from here ( http://www.printed.com/ ). As this was my first attempt, I ordered 2 versions, one with button art (top) and one without (bottom). This was just in case the art didn't line up.
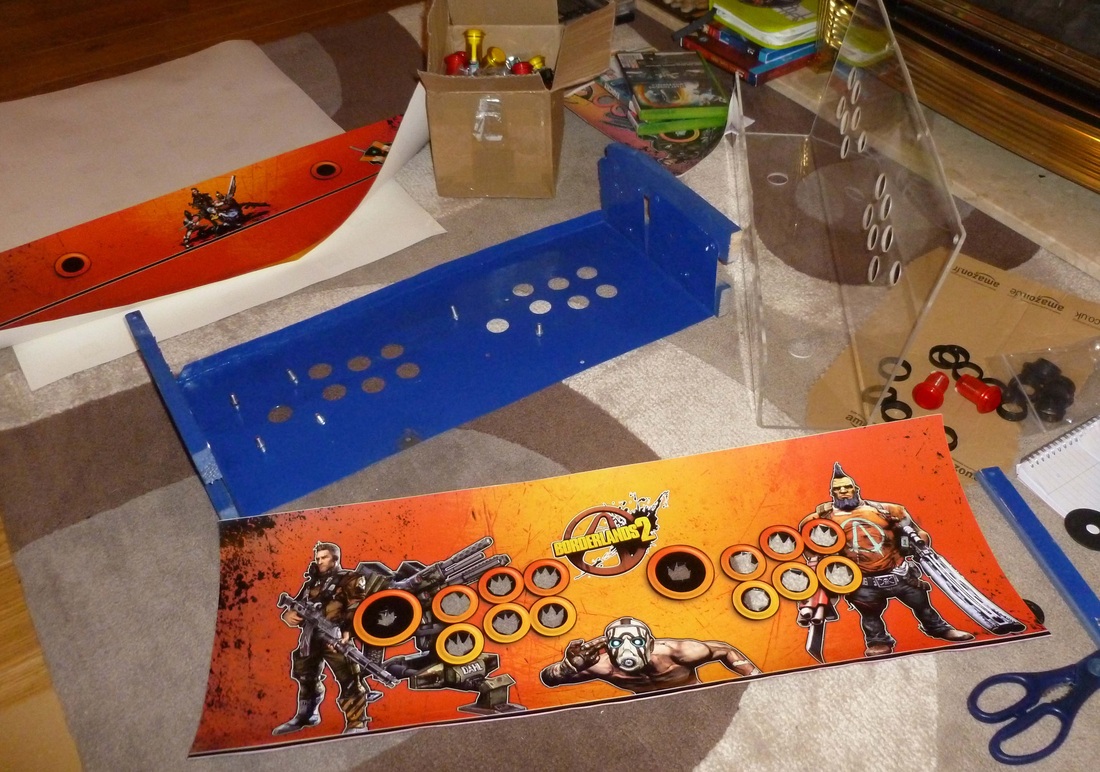
All the panel pieces ready and artwork trimmed, ready to fit.
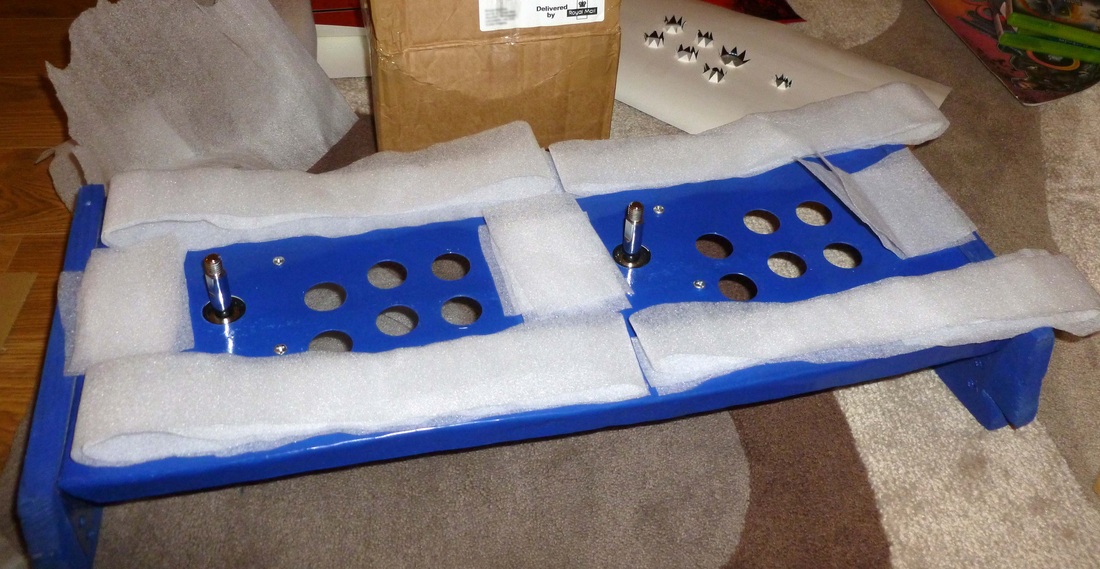
I used some foam to ensure the artwork would be pressed up against the plexi-glass.
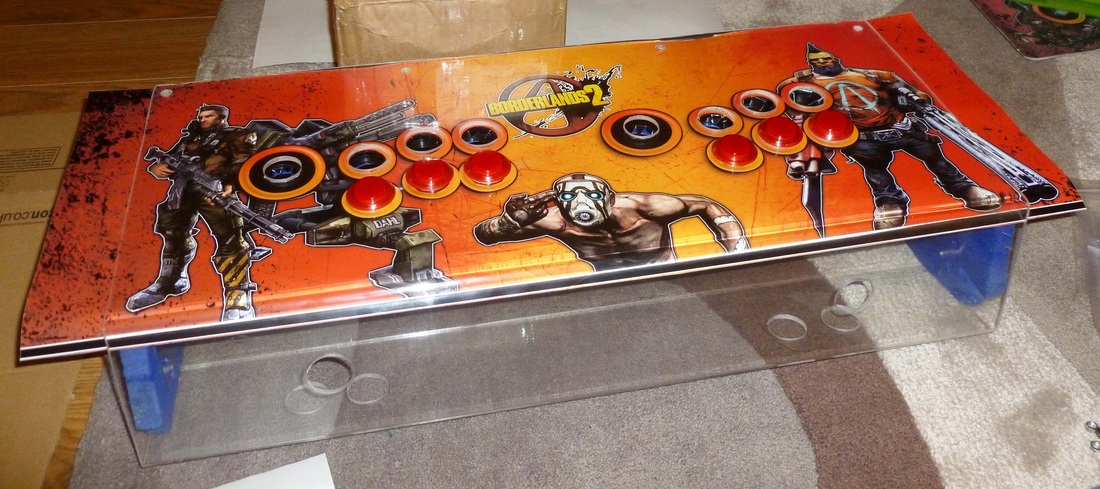
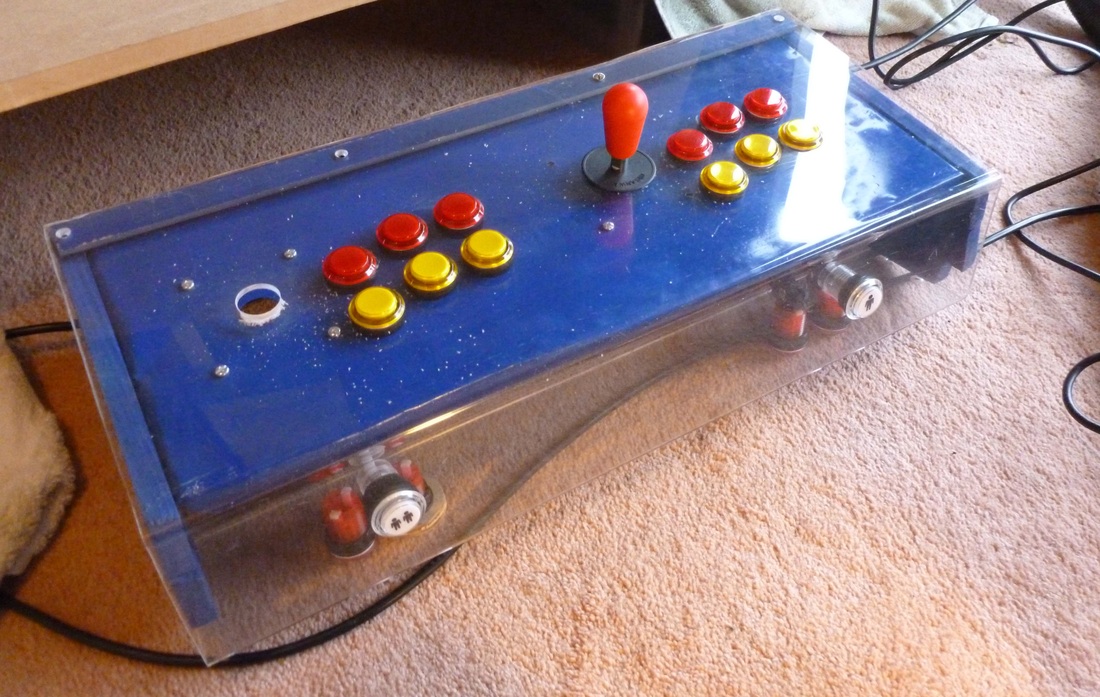
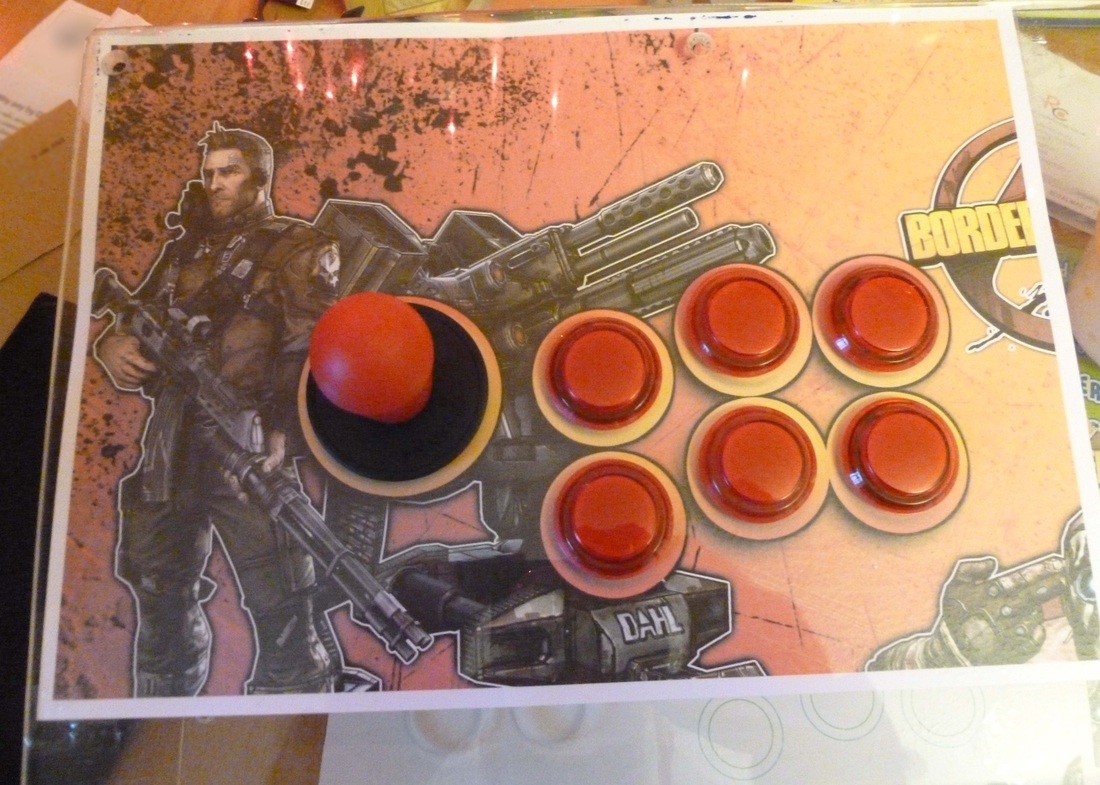
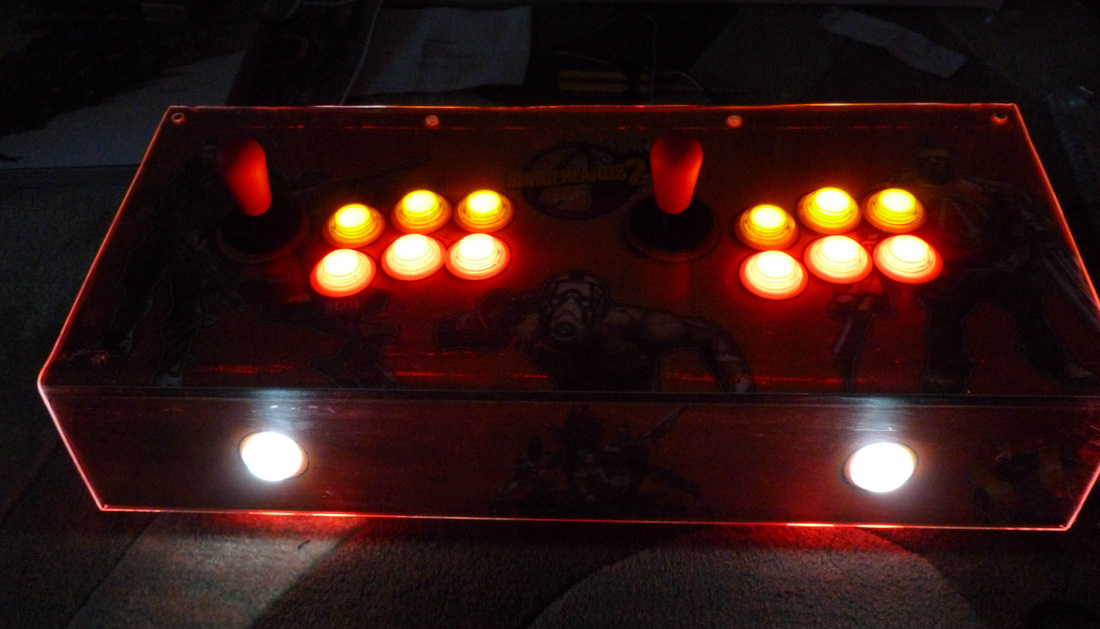
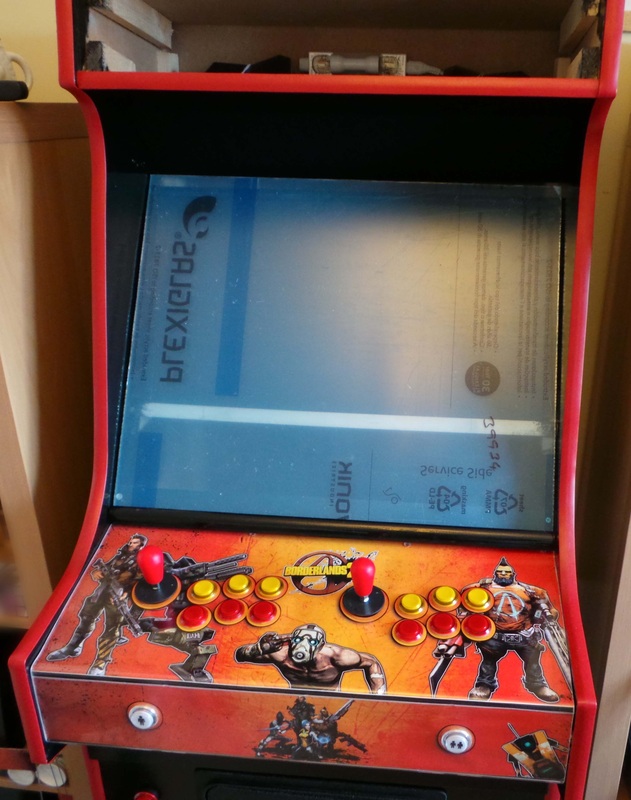
Artwork and buttons all lined up. It looked so much better than I expected.
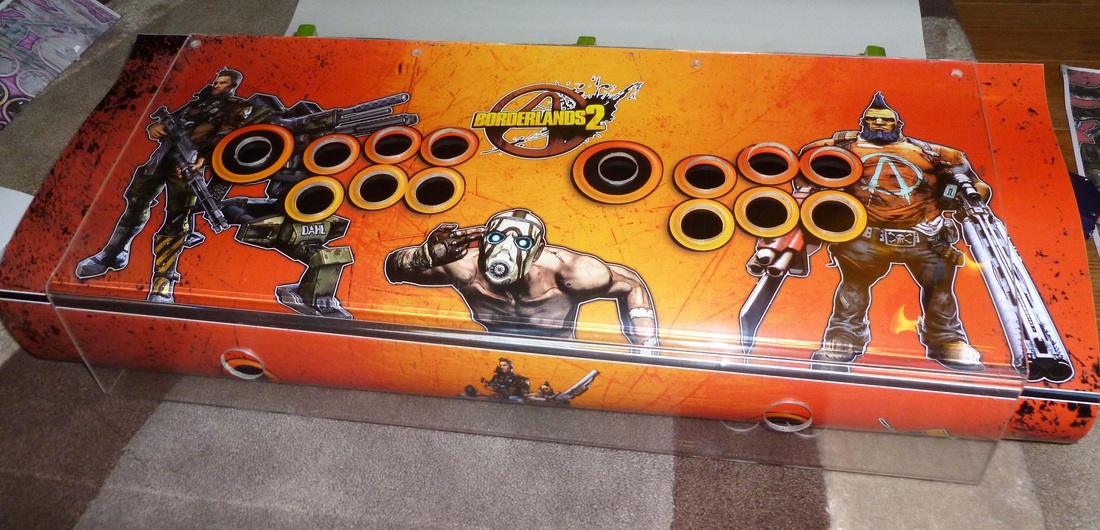
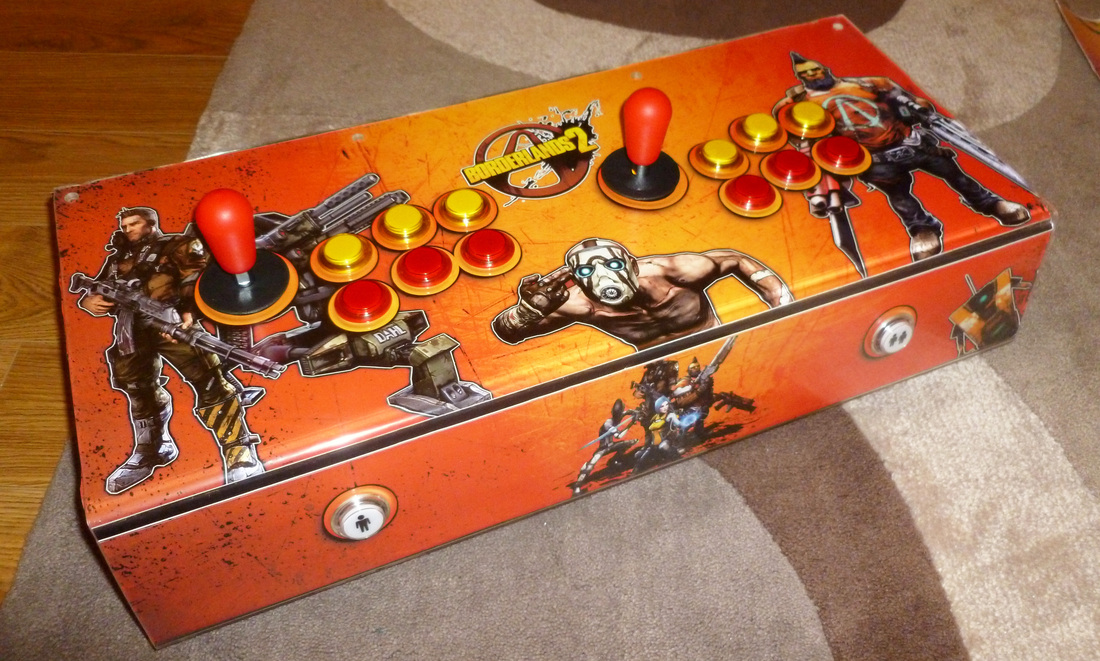
The final control panel. Looking very cool!
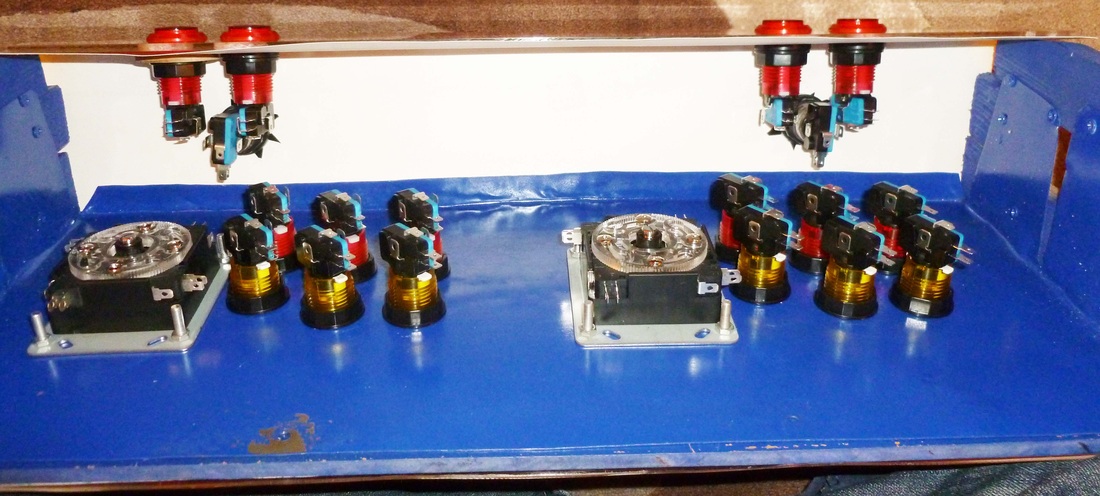
Here's the inside of the panel. The micro switches and LEDs are ready for wiring to the mini PAC keyboard controller.
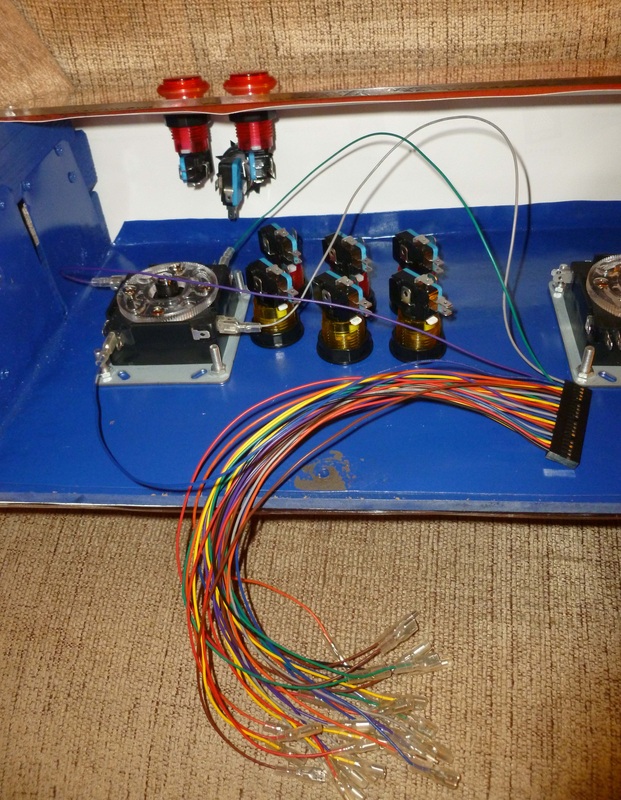
The wiring kit you get with the mini PAC is great. It's still a little tricky and you needed to be patient when connecting it all together.
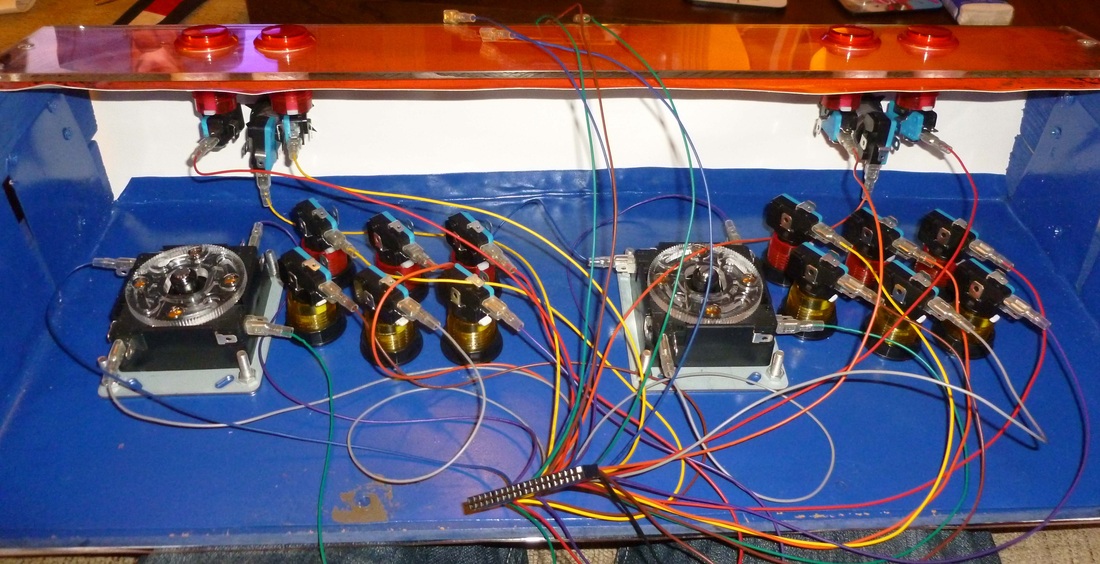
All the buttons and joystick micro switches are now connected to the main connector.

I then needed to run the ground wire (the black one) from one button to the next in a daisy chain.
Finally I had to wire up the power to the LEDs, this is the twisted red and black power cables.
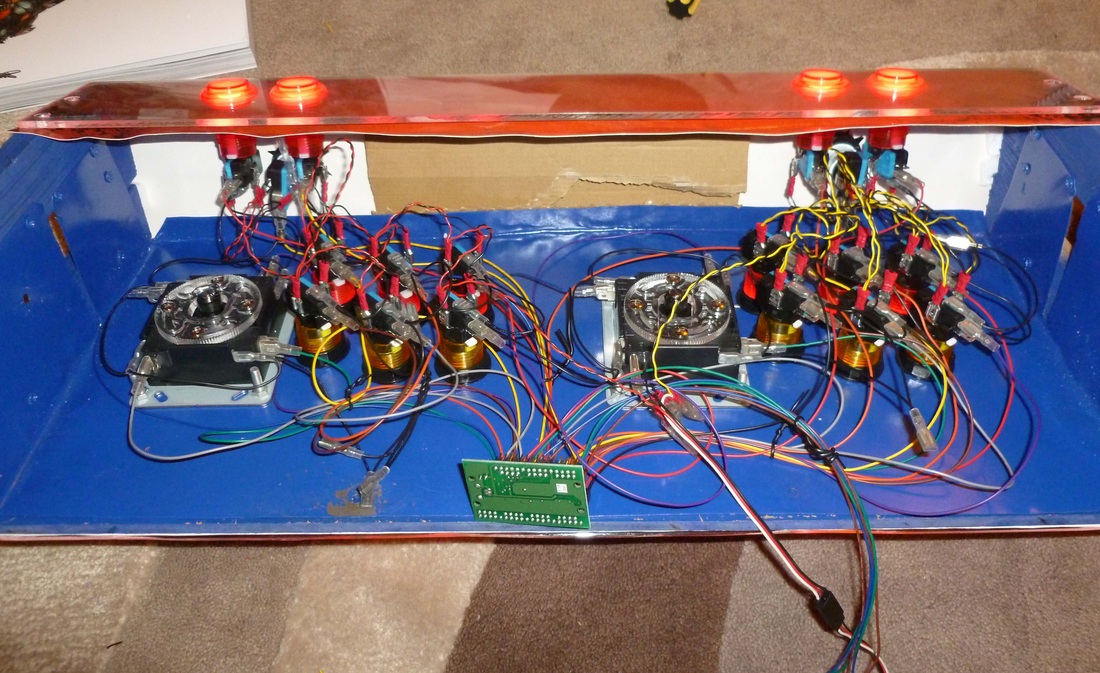
You can also see the mini PAC circuit board in the middle. 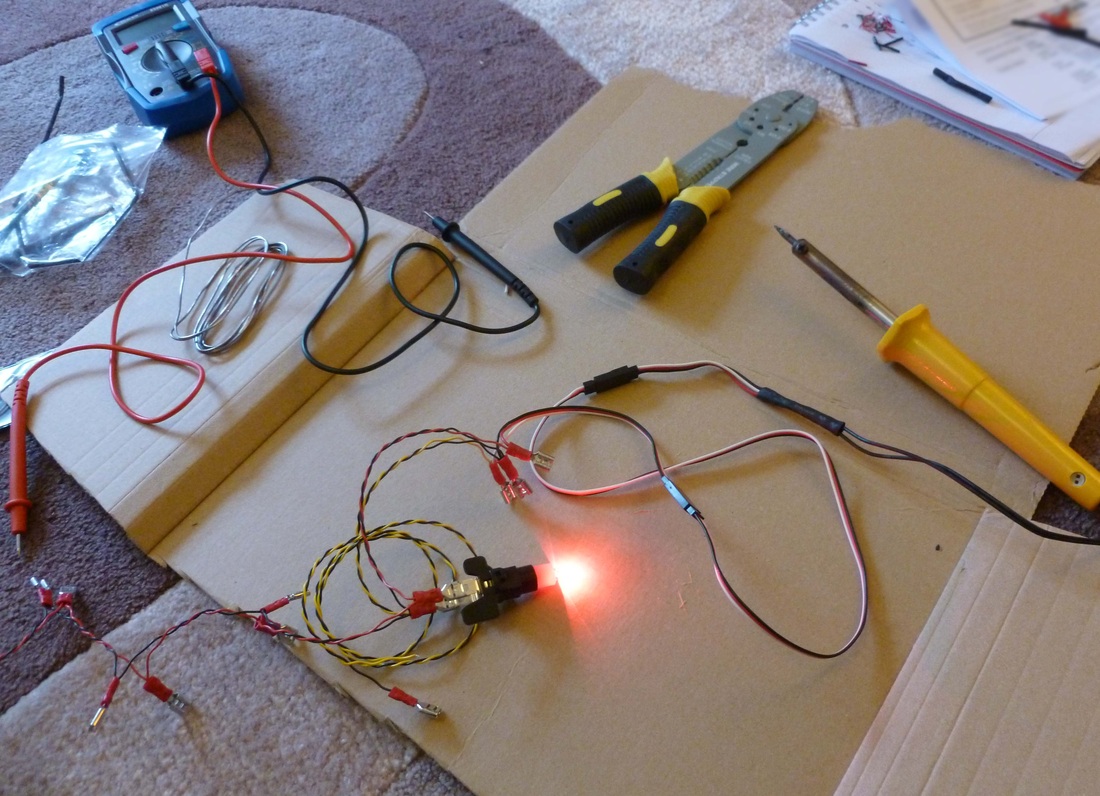
I needed a 6V 3A transformer to power the lights. You could feed this from a PC, but I use an old plug and transformer from a mini DVD player the I no longer used. Here, I'm just testing an LED and the power supply.
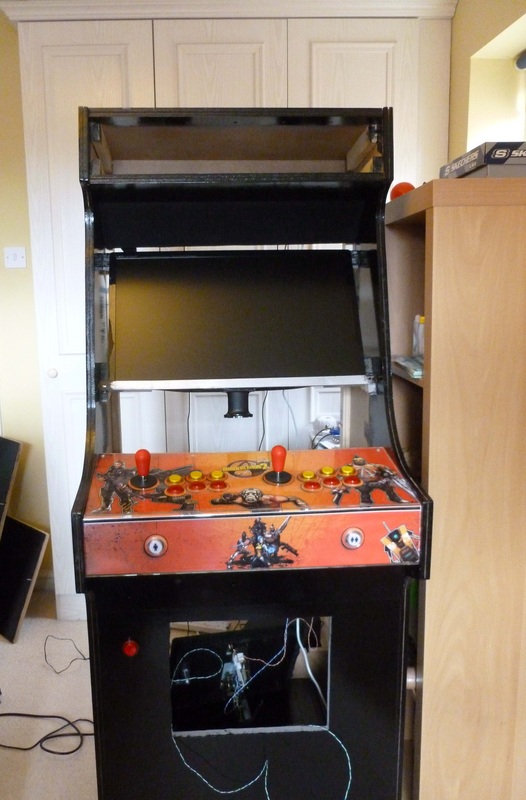
All connected and powered up! Looking sweet!

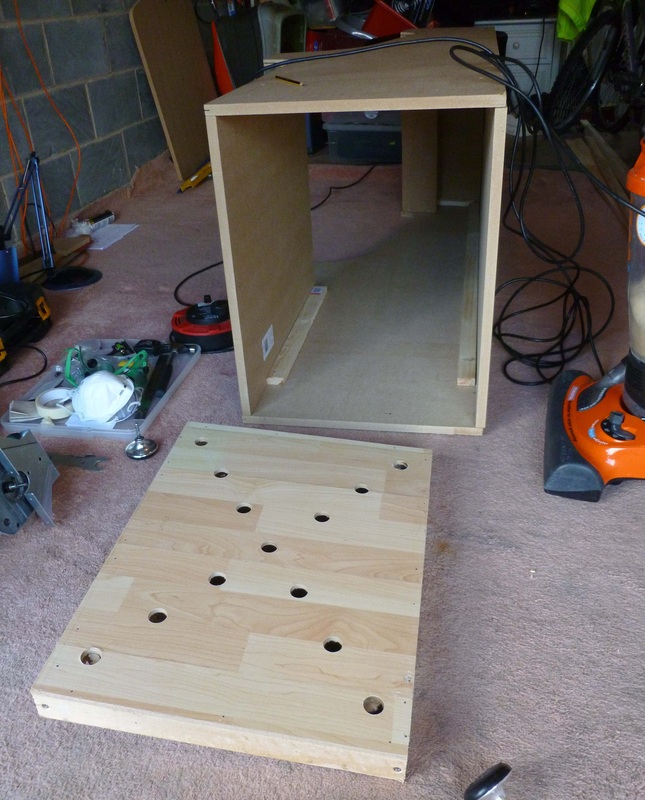
I bought an ACER 24 inch HD LCD TV for the display. Here it is on Amazon
The internal width of the cabinet is 600mm and the full width of the monitor is 570mm, so it's a great fit. I needed to invent a way to mount it. The TV is pretty thin, so I used a U shaped piece of aluminium to hold it in place. 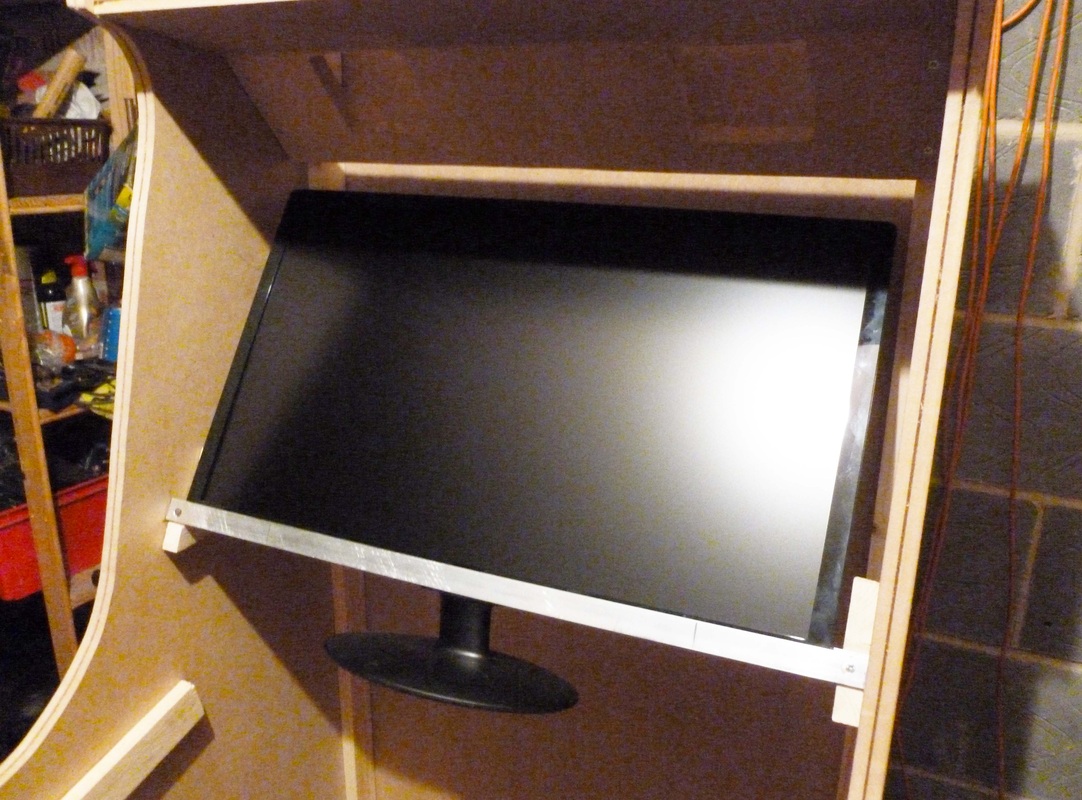
The mount worked really well. Very minimal and strong.
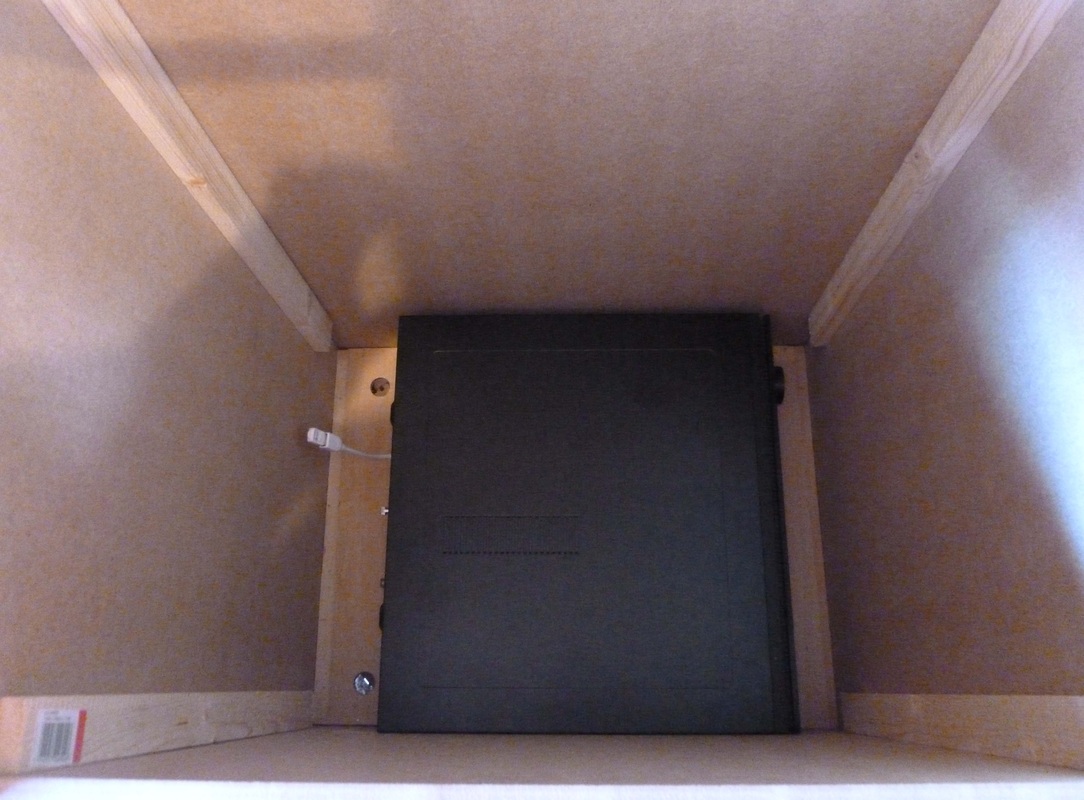
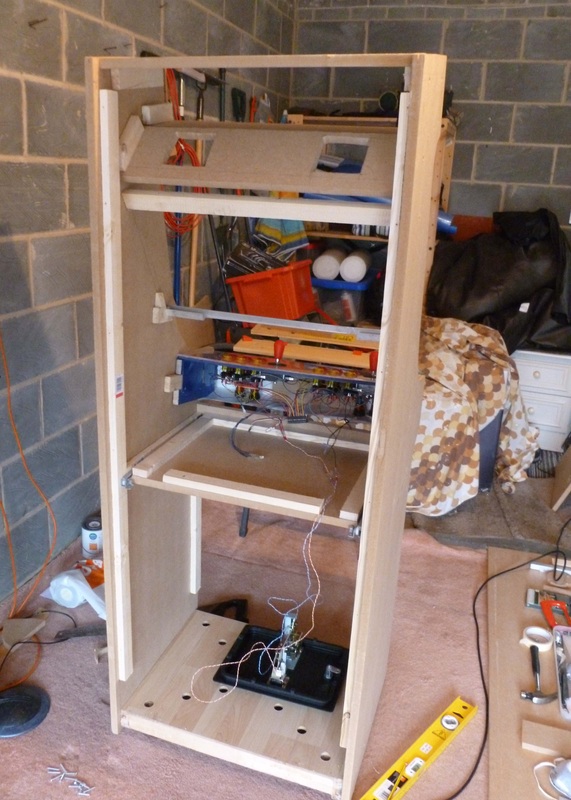
I swear I measured the cabinet and my PC and there was going to be plenty of room. When it came to drop the PC in there was only just enough room! Lucky!
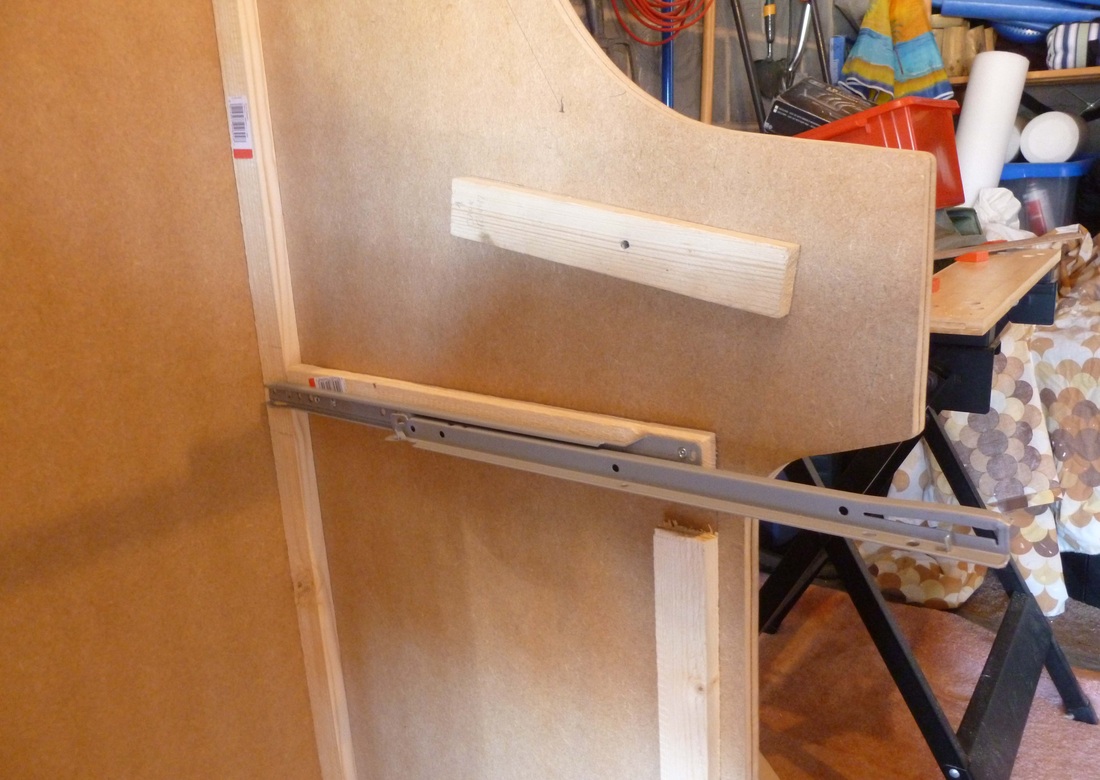
Mounting the draw slides.
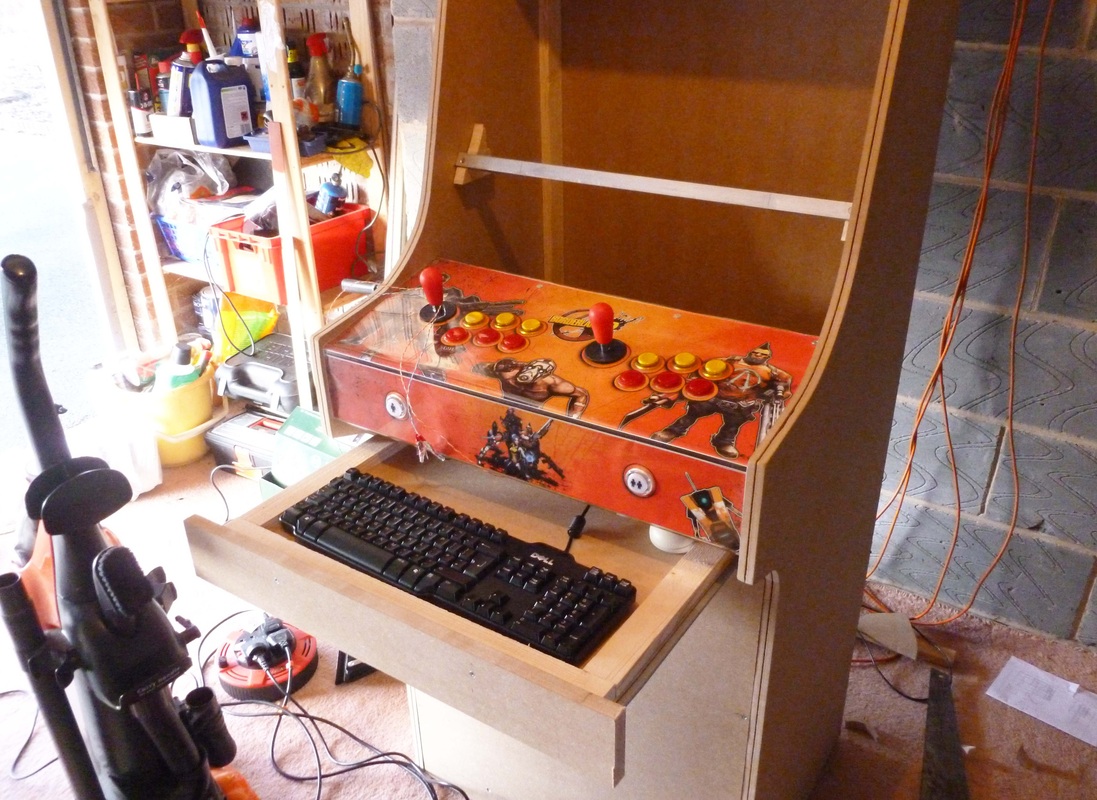
Keyboard and mouse draw all done.
I ordered a real coin door and mech from Arcade World. I'm about to cut a hole in the kick plate to mount it.
Notice the 2 twisted cables going to the coin door. One is power to the LED and the other is connected to a micro switch in the coin mech. This is connected to the mini PAC and is used to register when a coin is inserted. 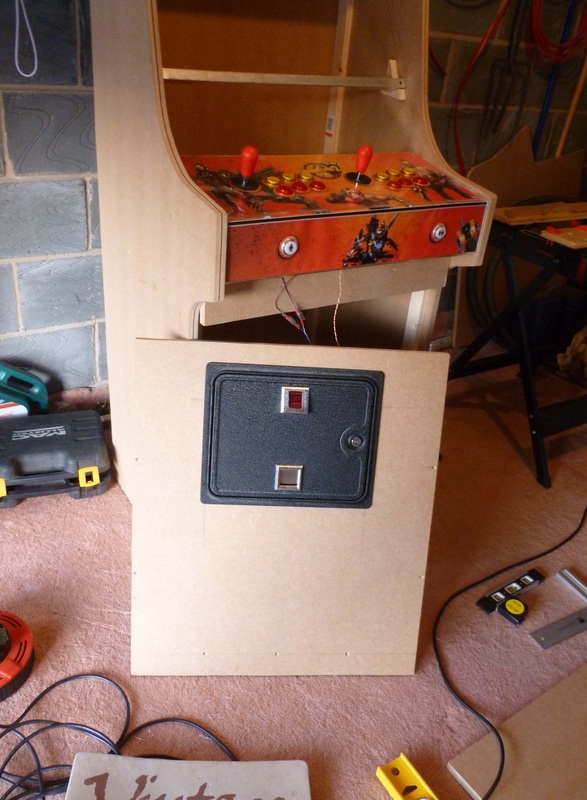
Coin door mounted.
This was the first time the machine was functional. It was amazing to see it work. LEDs, coin mech, buttons and joystick all worked first time!
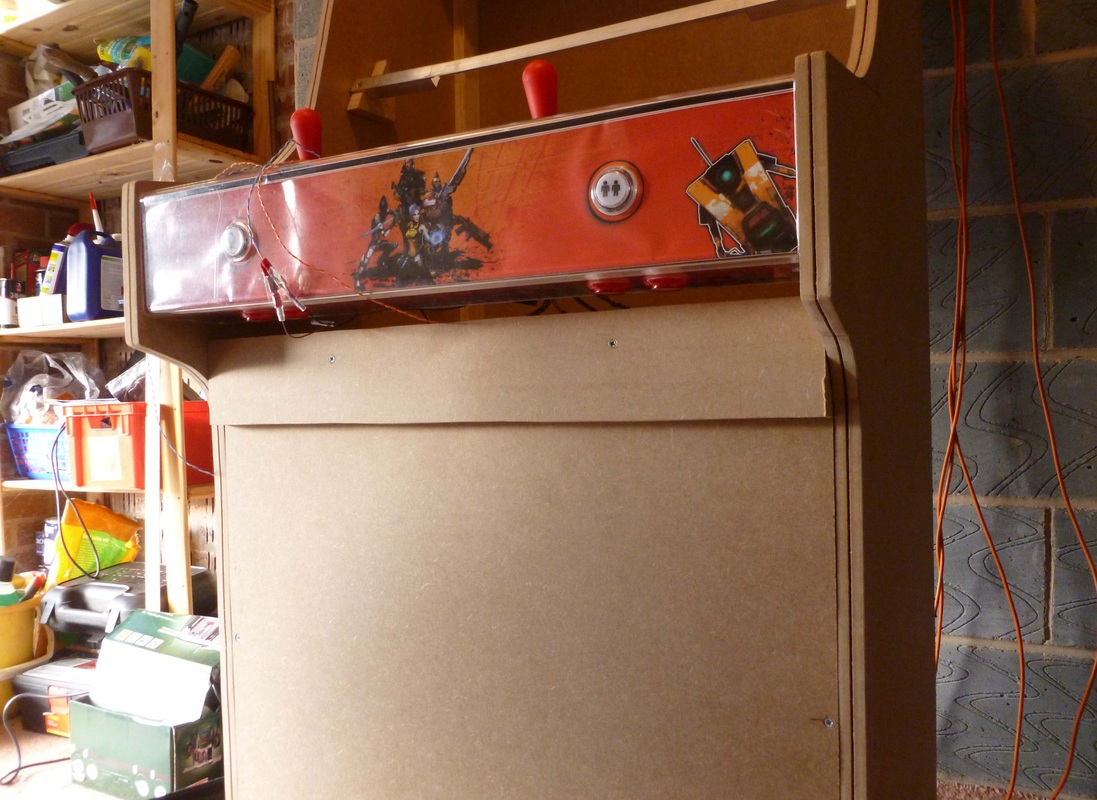
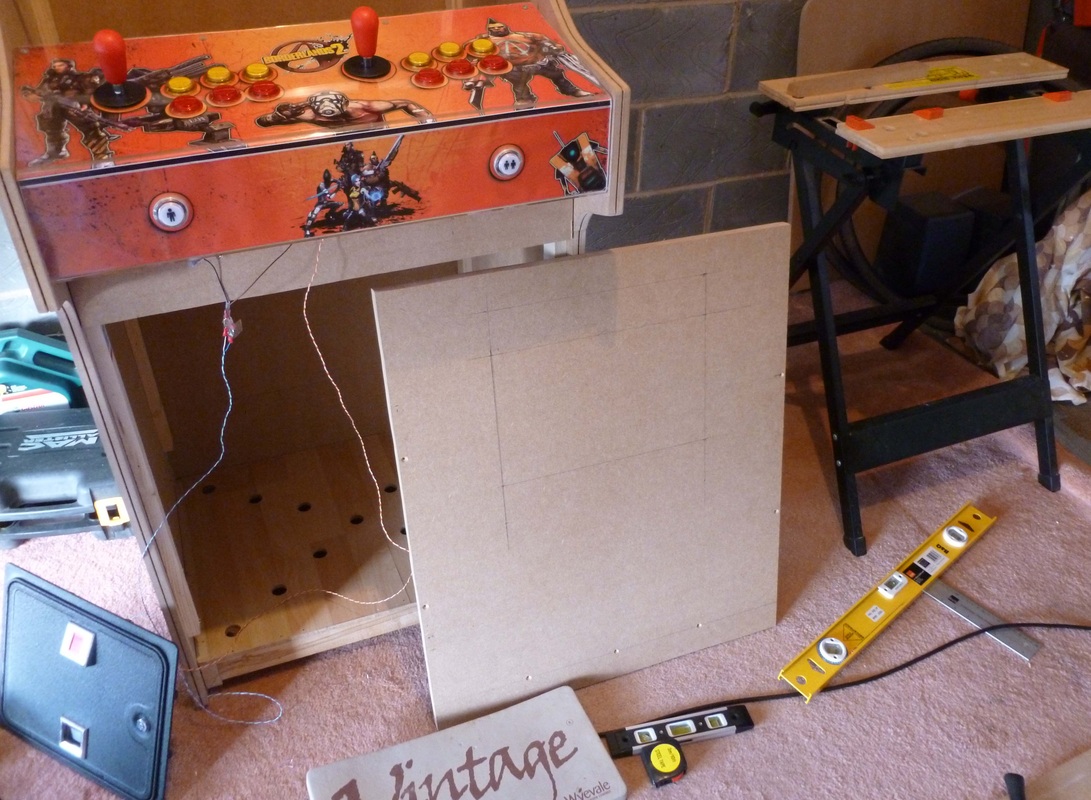
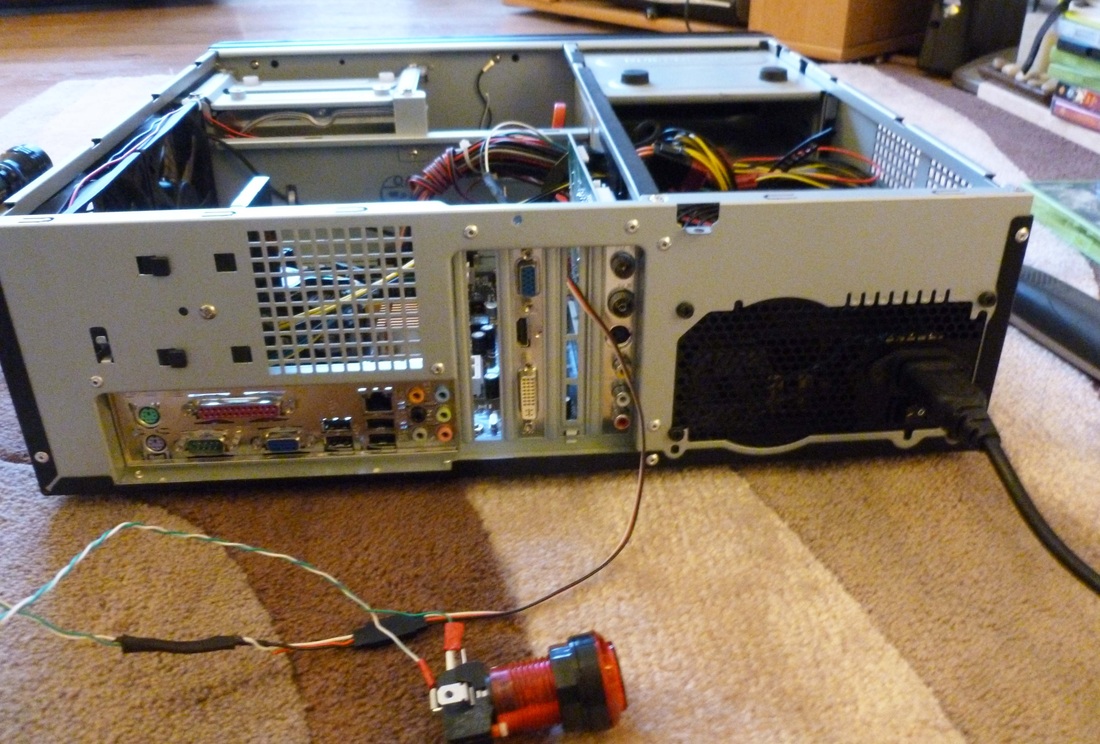
The cabinet with the back off. I just cut the back into a 5 parts so I could gain access to the cabinet later.

First coat of MDF primer.
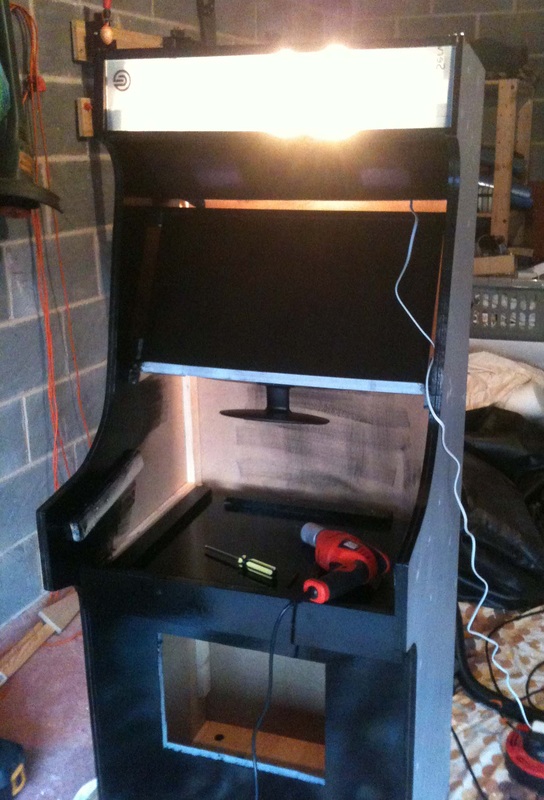
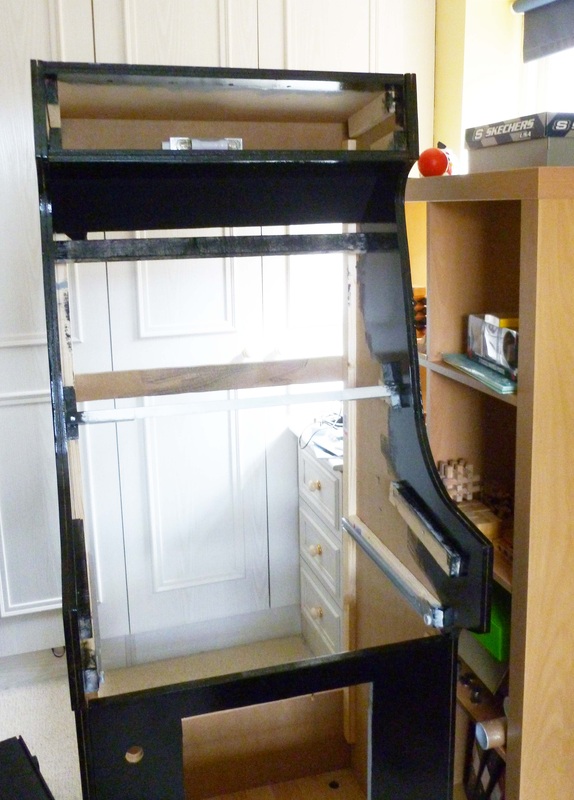
Now a coat of black gloss. I've just fitter the marquee light too. And you can see the plexi-glass in the marquee too.
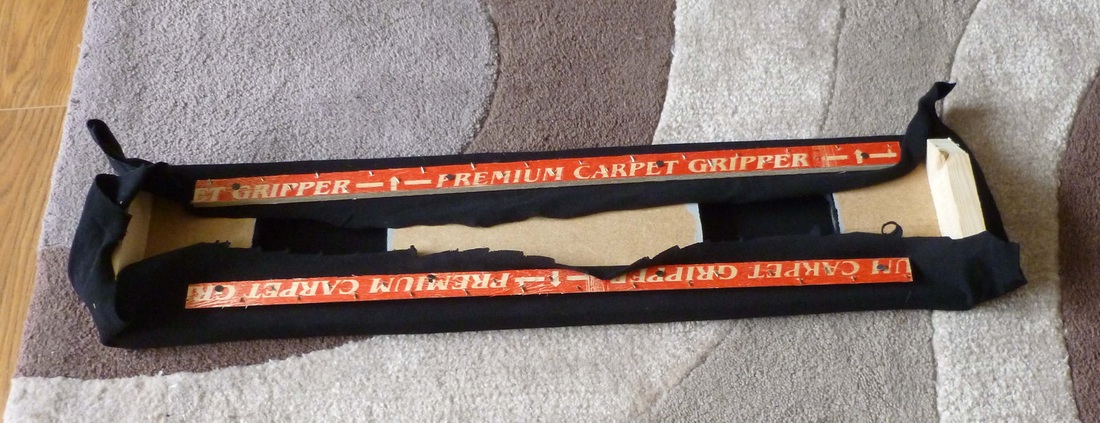
I needed to cover the speaker panel. In the end I just used an old t-shirt and help it in place with carpet grippers!
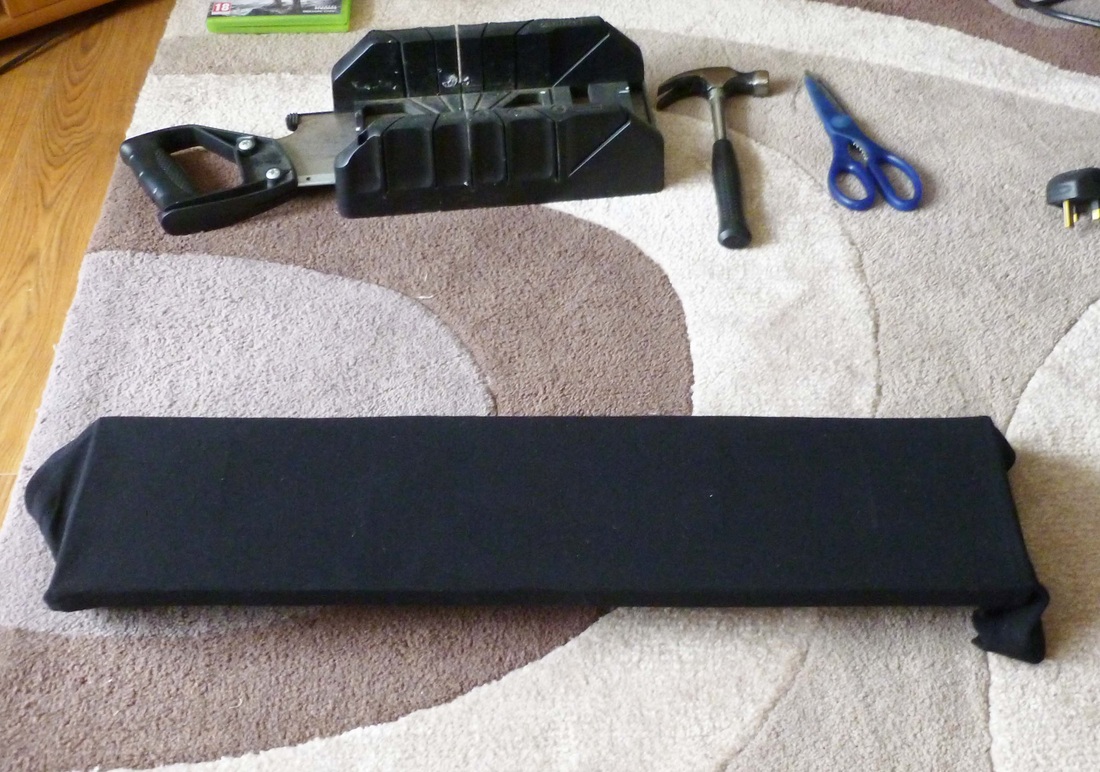
Perfect!
I order a 5.1 gaming surround system for the audio. It cost around £55 and it sounds awesome! 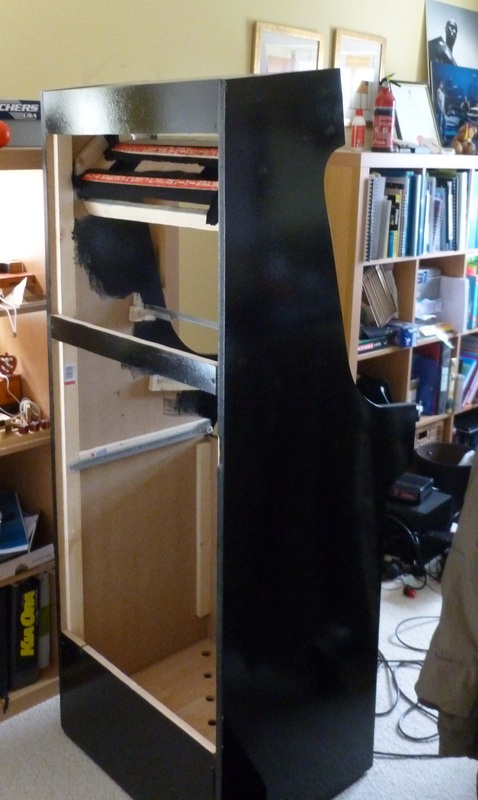
At this point I moved the cabinet from the garage to it's new home in my office. Even with all the kit and loose panels removed, it was still pretty heavy.
All of the main construction work is done, now it's time to assemble it.
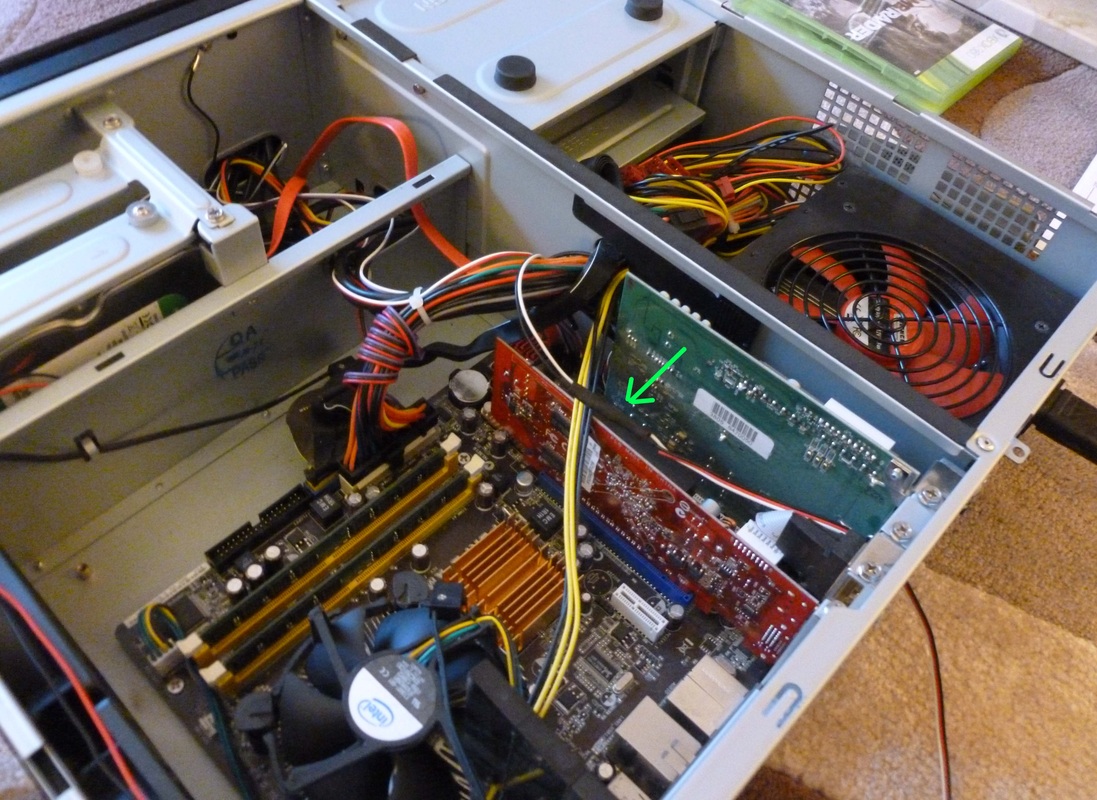
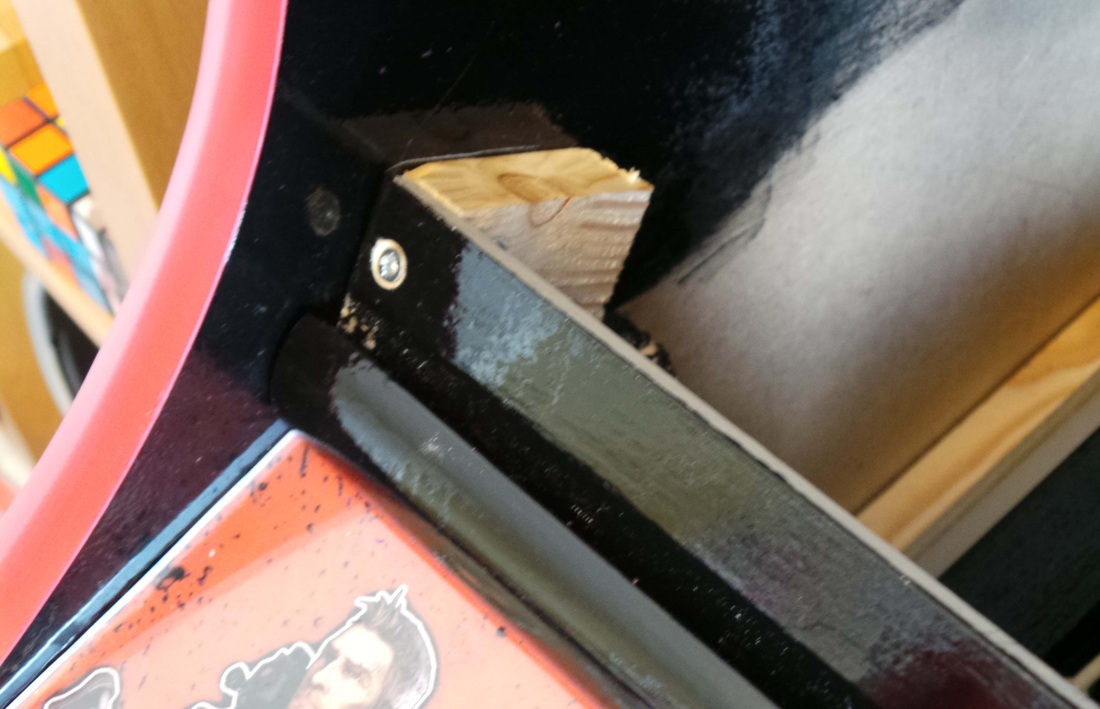
I needed a way to turn the PC on and off from the outside. I looked up the motherboard online and found the twin wires that were connected to the power switch. I simply snipped these off and soldered my own longer wiring . The green arrow shows the join and shrink wrapped insulation.
The wire is connected to an arcade button and hey-presto, I can now turn my PC on and off from another button!
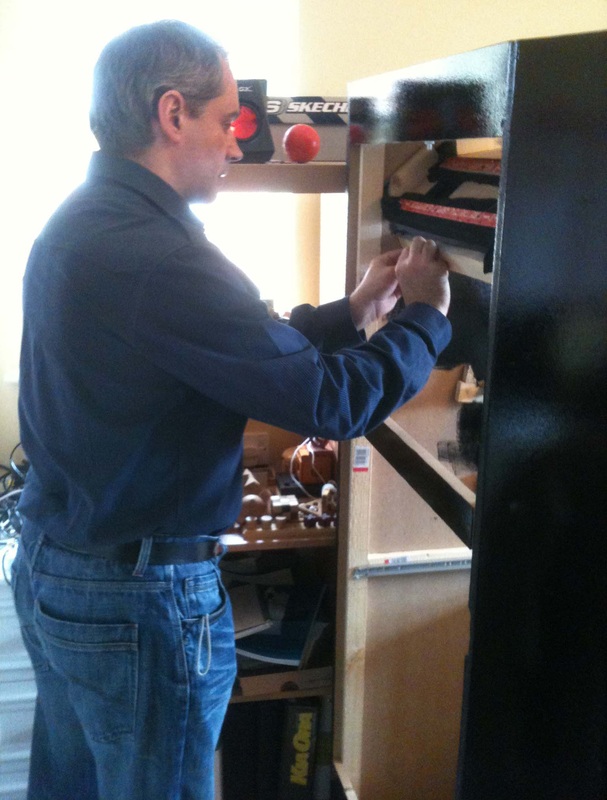
Here's me just starting to put it all together.
Half way through.
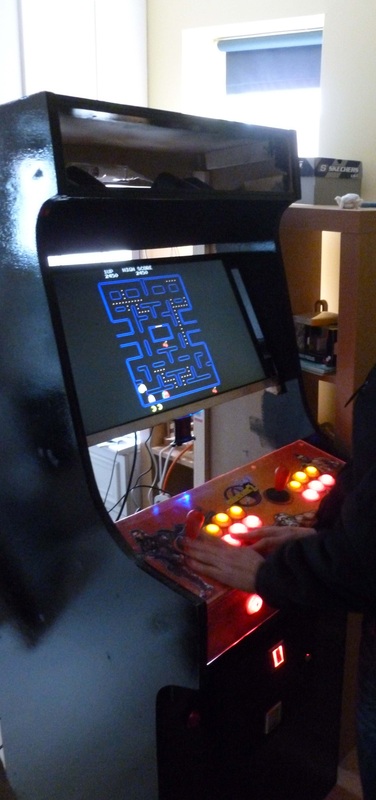
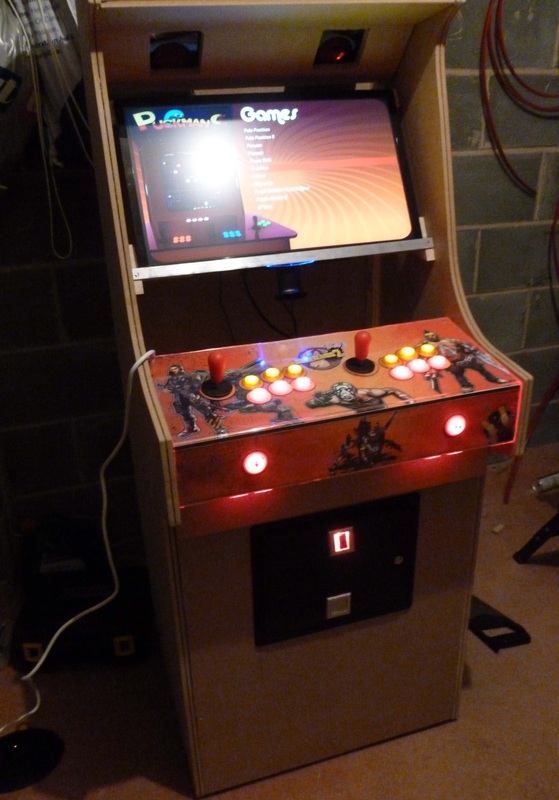
All the kit is wired up and working. A quick game of Pac-Man to test!
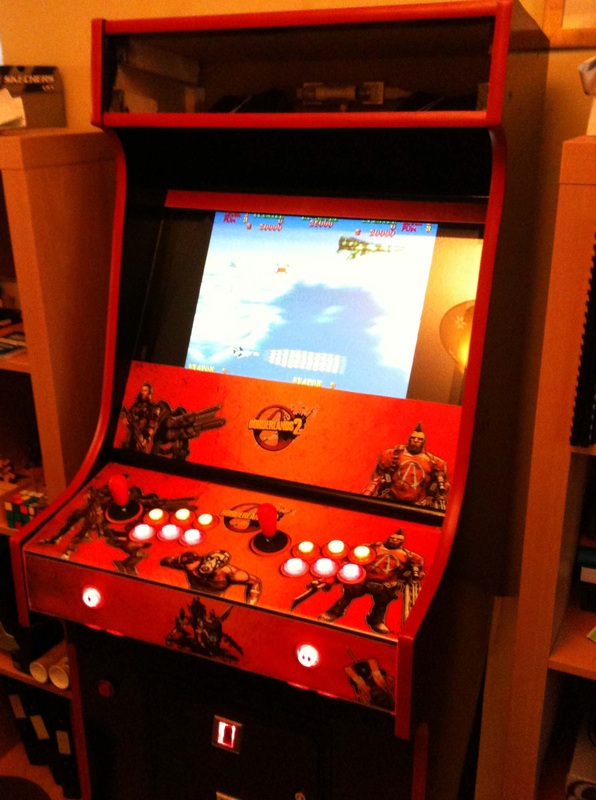
Here is the machine with the red T-moulding fitted. It's starting to look very polished.

I grew up in the Atari era. The first game I had published was for the Atari 800 computer. So I have an Atari 800 emulator on here too. This is a shoot 'em up called 'Sneakers'
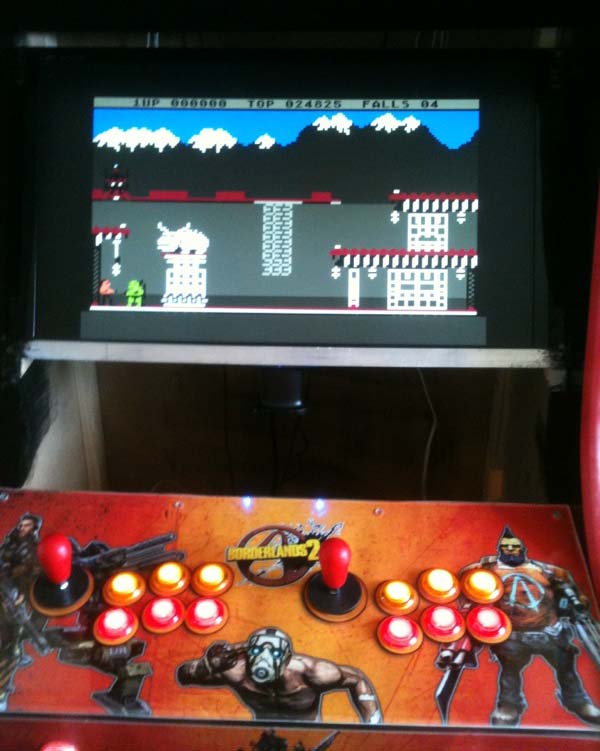
And here is Bruce Lee running on the Atari 800
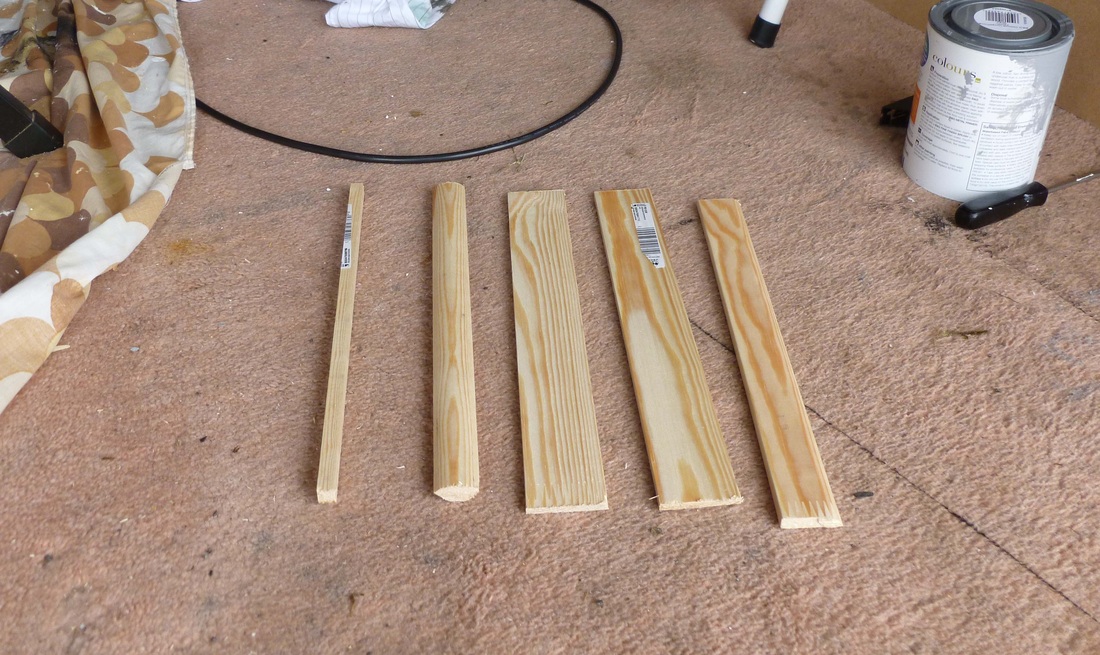
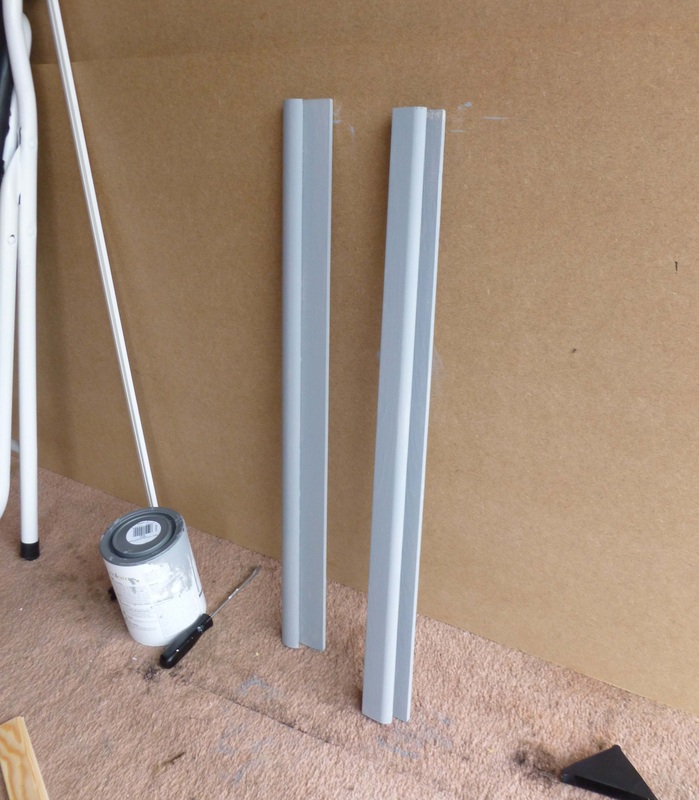
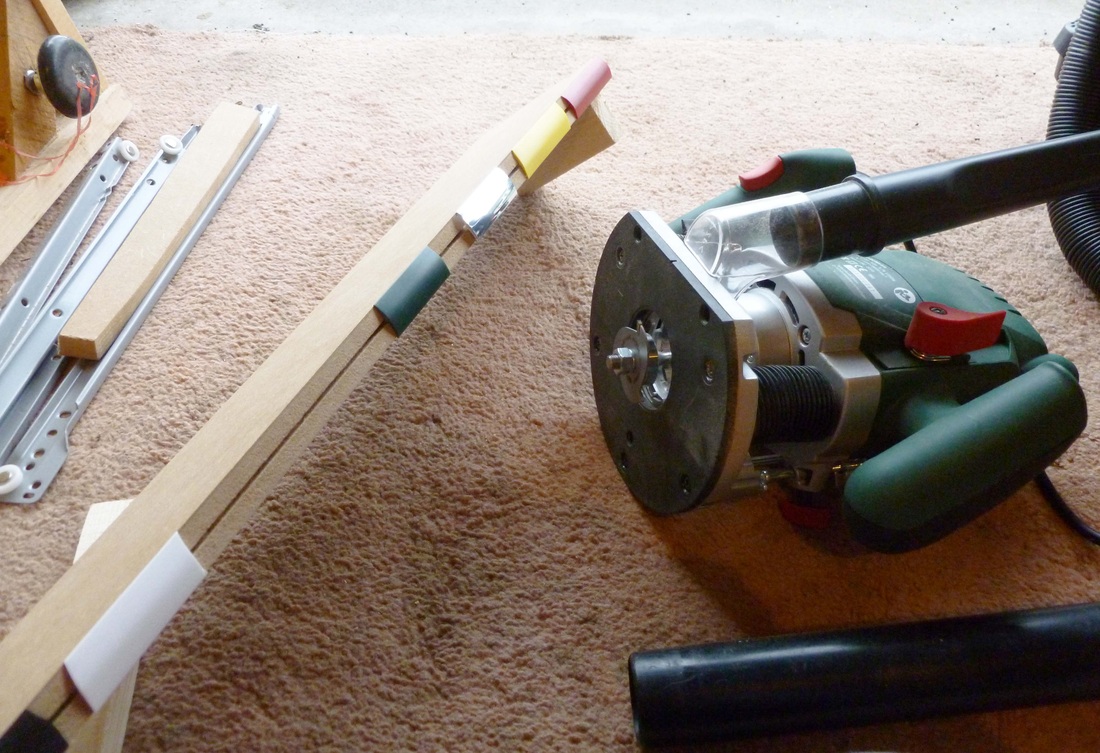
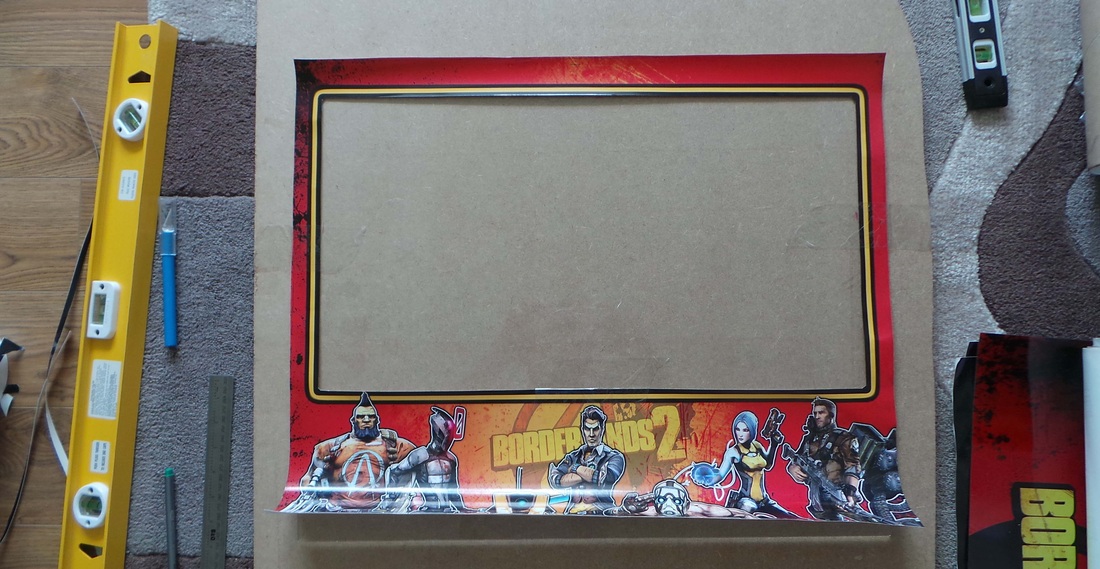
These two strips are made from wooden beading bought at a DIY store. They are designed to hold the screen plexi-glass in place (See below). All my plexi was bought fromwww.sheetplastics.co.uk
This is the bottom slot where the screen will sit.
And here's the plexi-glass held on place by the 2 wooden strips. It works really well and it's easy to slide out if I need access to the screen.
A lot of people have asked how the screen holder works, so here's a more detailed video showing it. It's a little dark, but I hope it's of some use.
I used some of the spare control panel artwork to mock up the plexi screen. Looking good.
Here's the vinyl artwork for the sides, kick plate, marquee and screen. Time for some careful cutting and sticking.
Lining up the plexi screen and artwork.
Trimmed and ready to stick.

All done and looking very cool!
Here's the final plexi screen in place.
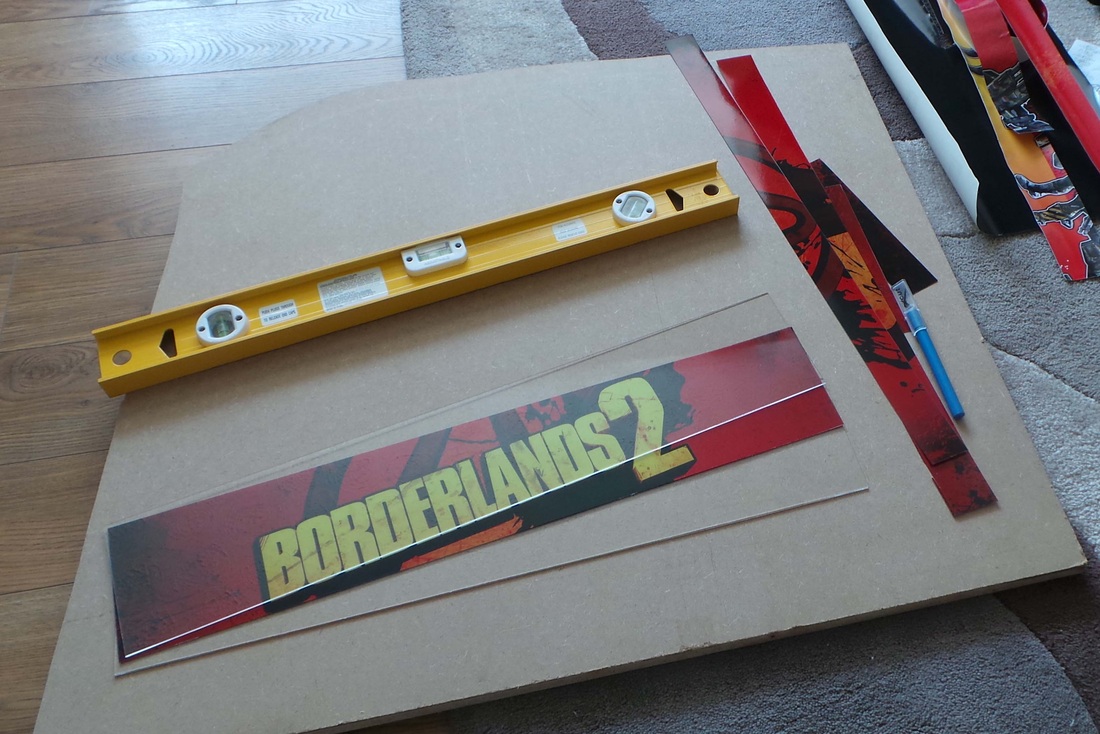
Next, to do the backlit marquee.
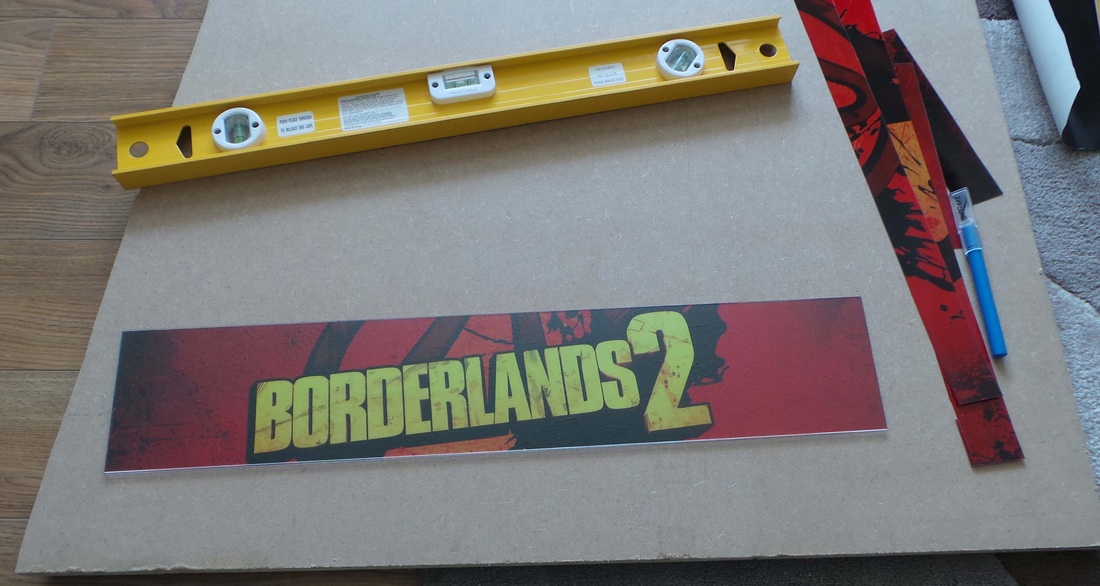
The backlit graphic is sandwiched between two pieces of 2mm plexi glass.

Slots neatly into place.
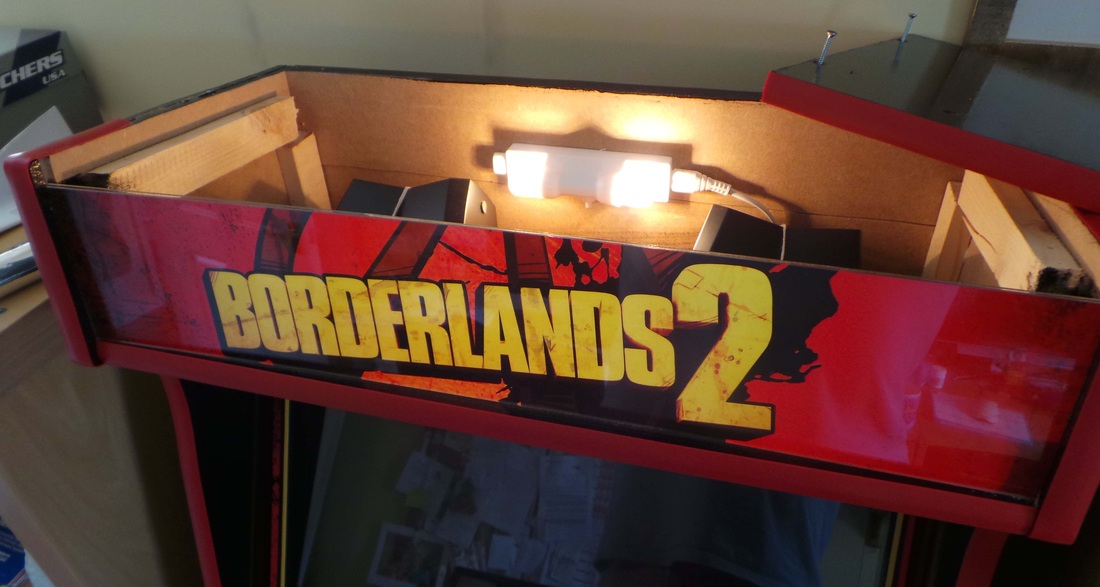
Light check...
Wow - looking good!
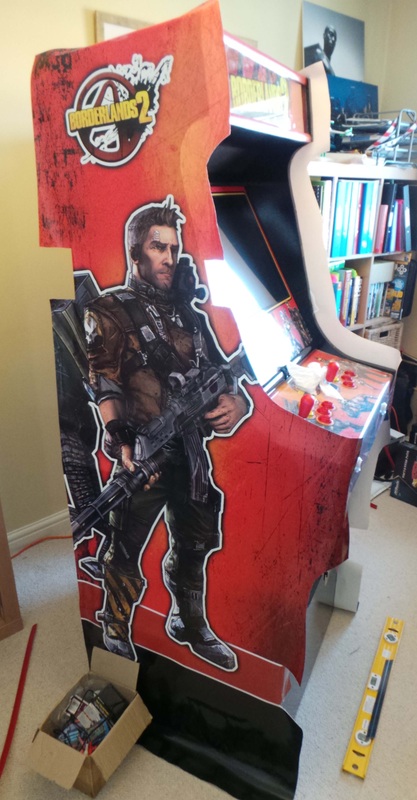
The final part was to hang the side art and kick plate art.
This required a lot of patience, measuring, checking and re-checking. Here the artwork is trimmed and just tacked to the side. 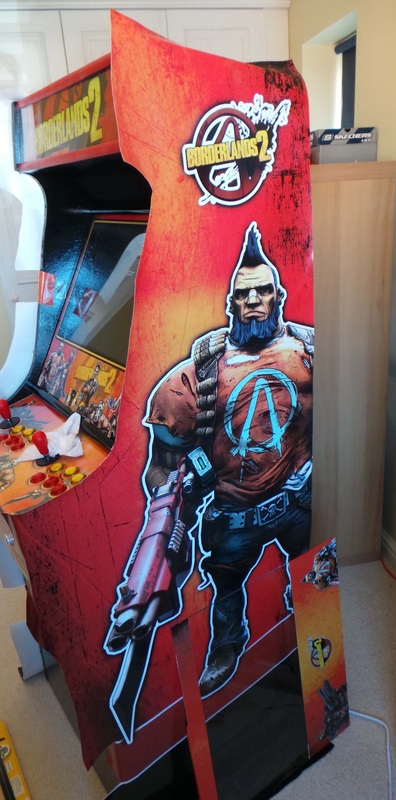
Lining up the right side.
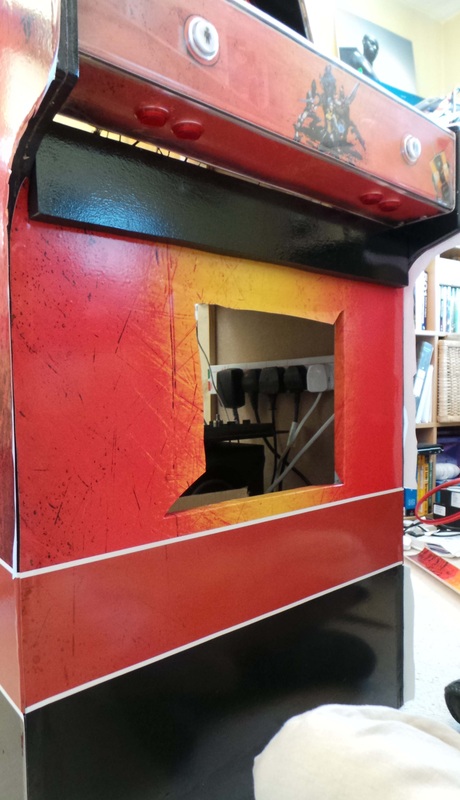
The kick plate art with a hole for the coin door.

Nearly there! Artwork is all stuck down and trimmed. Just the T-moulding to add back.
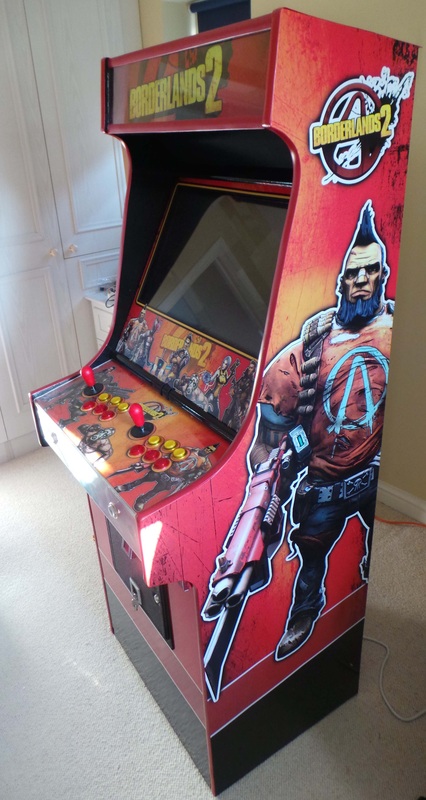
Woo!! And here's the finished cabinet! 10 months of work and I'm so happy with the result. It tuned out so much better than I thought. I love my cabinet!
Now, it's time to get the lads round and play some games!
Update Feb 2015: You can download the cabinet artwork here.

The mobile version of Beat Hazard Ultra is now available on the Samsung Apps store.
This was submitted as part of the 100% Indie scheme where the developer get 100% of the profits in the 1st year! Check it out here.  32 Indie Game on Sale - 100% of Sales go to the Indies You can now get the Steam & Non-DRM versions of Beat Hazard Ultra at the bargain price of $5 in the 'Show Me The Games' sale. Here is the direct sale link There are also 32 other Indie game on sale. 'Show Me The Games' is an Indie site run by Cliffski (of Positech Games) where Indies get 100% of the sales. Read his blog here. We don't have an advertising budget, so please help spread the word! Sale from 11th - 18th May
 Beat Hazard Ultra is now available on Desura! Click on the link below to check it out.  
The Humble Bundle for Android 5 has just finished. It sold 210,000 copies and made $1.46m for the developers, humble guys and 2 great charities.
Thanks to the gang at Humble Bundle for having Beat Hazard and thanks to all that bought the game and helped raise money for charity. I hope you enjoy the games! 
Beat Hazard Ultra is now out for Linux on Steam. Click here to check it out.
It's my fist Linux port, so if you have a problem pop over to the Steam forums for help. Enjoy! 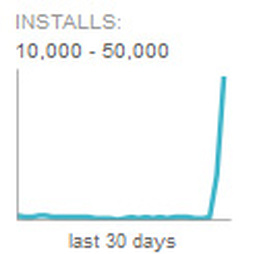 Beat Hazard Ultra has been featured on the Google Play store (Thanks Google!). You can see from the graph above what that means in terms of sales. It's my favourite graph of the day! Despite the game doing very well on other platforms, having a dedicated following of players and my best efforts to advertise the game when it came out on Android, you just can't beat being on the front page of the store. 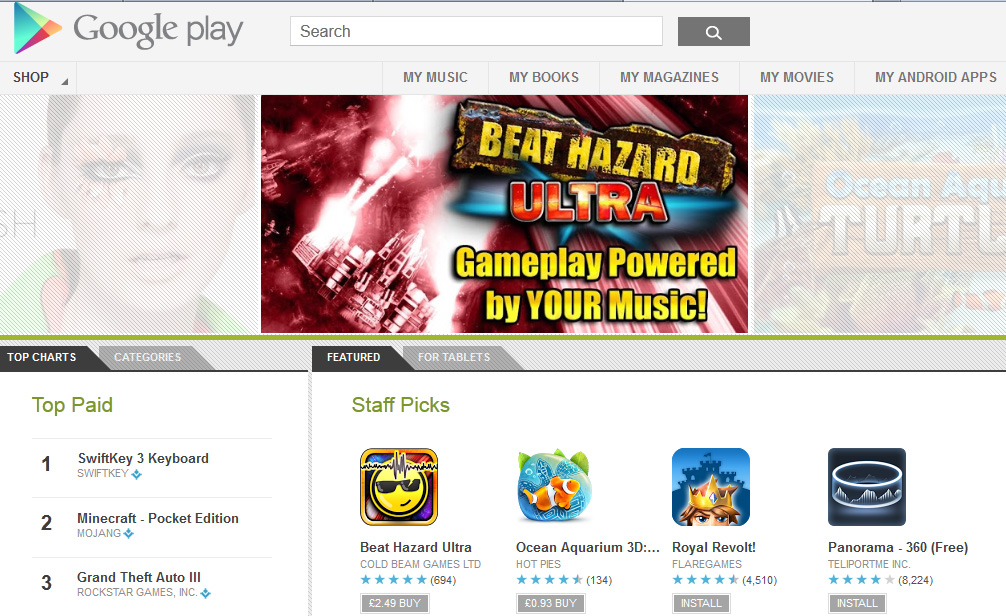 Here it is on the store page and in the Staff Picks section. I'm very proud!  And customer satisfaction is very high. This is great as I was worried about all the different phones/tablets out there that might not run the game properly.
Thanks to everyone who's bought the game! |
Archives
December 2020
|
 RSS Feed

|
|

Discord
|

Beat Hazard 1+2+3
|
Copyright 2010-2022 Cold Beam Games Ltd.